Posted on

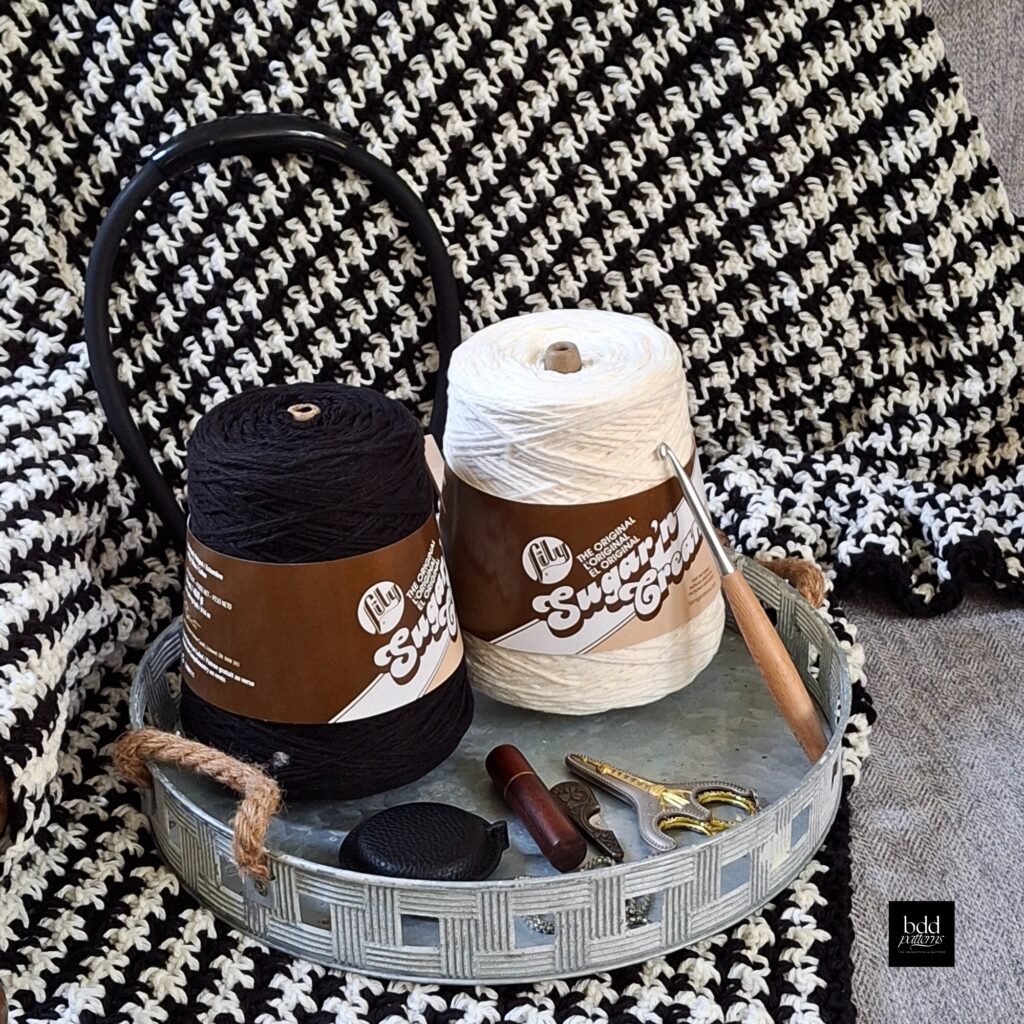
The Story of Lily Sugar’n Cream Ecru Cones: Why This Beloved Cotton Yarn Became So Hard to Find

what happened to lily sugar and cream ecru yarn

If you’ve been crocheting or knitting for any length of time, chances are you’ve used Lily Sugar’n Cream cotton yarn. For decades, it has been a staple in the crafting community, particularly for those of us who love creating practical, beautiful projects with 100% cotton yarn.

Dishcloths, market bags, kitchen accessories, baby items, home décor, and countless other projects have been made with this dependable yarn. Among the many color options available over the years, one color stood out as a favorite for many makers: Ecru.

Ecru wasn’t flashy. It wasn’t trendy. It wasn’t a seasonal color that came and went with the latest home décor styles. It was simply a beautiful, natural-looking neutral that worked with everything. It became a staple color in countless pattern collections and stash shelves across the country.

So, what happened?

Over the past few years, many crocheters and knitters began noticing something unusual. The once easy-to-find Lily Sugar’n Cream Ecru cones seemed to disappear from local store shelves and online retailers alike. What had once been readily available almost everywhere suddenly became increasingly difficult to find.

As someone who uses this yarn regularly, I wanted to dig deeper into the story behind its disappearance, explore whether quality concerns had been addressed, and most importantly, share where fellow makers can still find it.

A Long History in American Crafting

For many makers, Lily Sugar’n Cream represents more than just another cotton yarn option.

For years, it was known for using cotton sourced in the United States and manufactured in the United States. Many crafters appreciated not only its affordability and availability but also the consistency that came from purchasing a product they had trusted for decades.

Because it was carried by major retailers throughout the country, it became accessible to nearly everyone. Need one more cone to finish a project? Chances were good you could find it at your local craft store.

Its reputation was built over generations of knitters and crocheters who relied on it time and time again.
Changes in Ownership and Manufacturing

As many makers have discovered, businesses evolve over time. Lily Sugar’n Cream eventually became part of a Canadian-owned company, and manufacturing shifted from the United States to Canada.

Whenever a long-established product undergoes significant operational changes, consumers naturally pay close attention. In the yarn world, even subtle differences can matter greatly.

Yarn enthusiasts are incredibly observant. We notice differences in texture, thickness, twist, softness, absorbency, and consistency. It’s part of what makes us passionate about our craft.

Following the manufacturing transition, some users began reporting concerns about quality differences compared to previous versions of the yarn they had come to know and trust.

Addressing the Quality Concerns

It’s important to approach this topic fairly and respectfully.

Many makers shared experiences regarding variations they noticed after the manufacturing changes. Some mentioned inconsistencies between skeins, changes in texture, or concerns about the overall feel of the yarn.

At the same time, it’s worth noting that manufacturing transitions often involve adjustments and refinements. Product feedback plays an important role in helping companies identify areas for improvement.

Based on more recent experiences within the crafting community, many users feel that some of these concerns have been addressed. While individual experiences will always vary, there appears to be a growing sentiment that the yarn is performing more consistently than during the initial transition period.

The goal here isn’t to criticize Canada or the manufacturing changes themselves. Rather, it’s to acknowledge the reality that longtime users noticed differences during a period of transition and to recognize that improvements seem to have been made.

As crafters, we simply want confidence that the yarn we purchase today will perform similarly to the yarn we used yesterday.

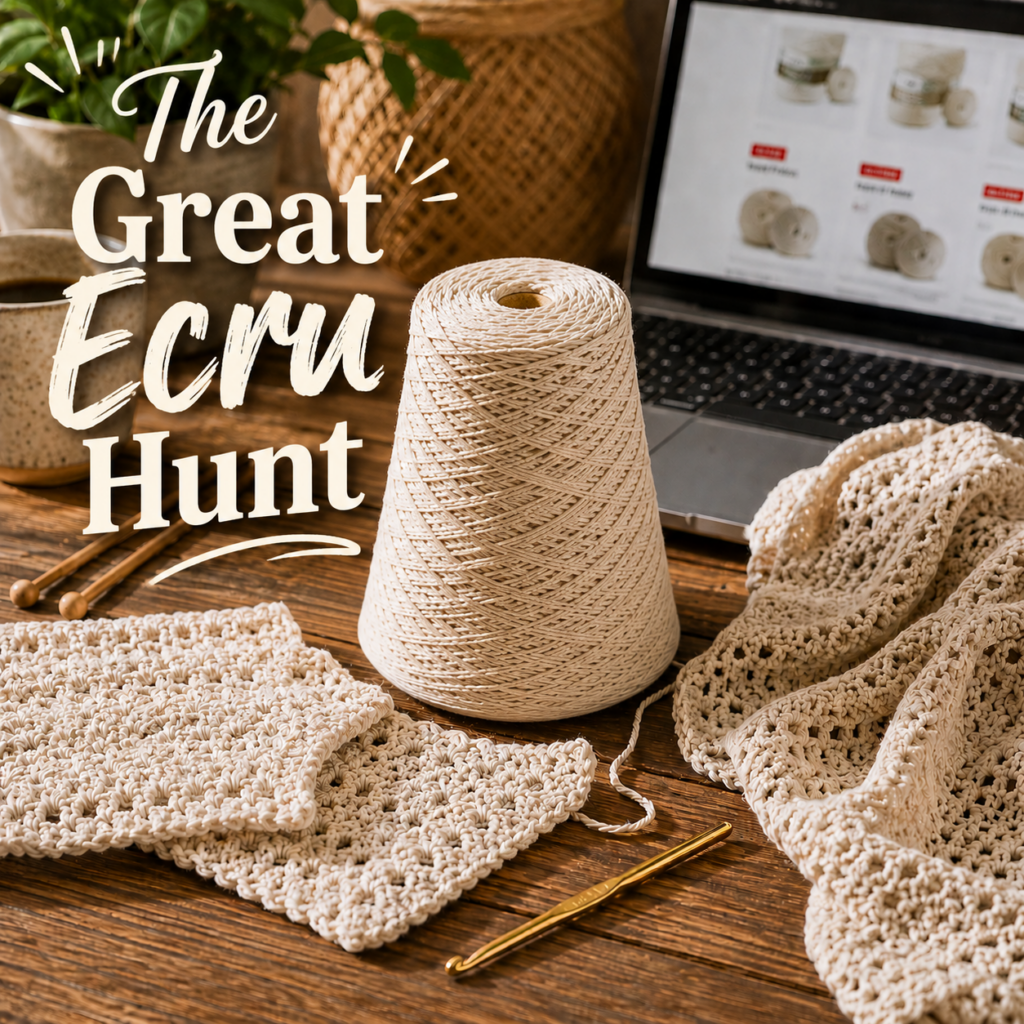
The Great Ecru Cone Hunt

Perhaps the biggest challenge wasn’t necessarily quality concerns.

It was simply finding the yarn.

For years, Lily Sugar’n Cream Ecru cones were readily available through major retailers. Then, seemingly overnight, they became increasingly elusive.

Many makers found themselves asking questions like:

  • Has Ecru been discontinued?
  • Are the cones no longer being produced?
  • Is there a shortage?
  • Why can’t I find it anywhere?

Adding to the frustration was the fact that Ecru isn’t widely available through Amazon, despite many crafters turning there first when local stores don’t have what they need.

When Ecru cones did appear through third-party sellers, prices were often significantly higher than what many of us had grown accustomed to paying. In some cases, the cost had nearly doubled.

For budget-conscious makers, especially those creating larger projects requiring multiple cones, these price increases made a noticeable impact.

The Changing Craft Retail Landscape
Another important piece of this story involves the changing retail environment for fiber artists.

Many of us have watched the crafting landscape shift dramatically over the past several years.

The closing of Joann stores in various communities has had a profound effect on local access to yarn and crafting supplies. For countless crocheters and knitters, Joann wasn’t simply a retailer.

It was where we:

  • Felt yarn before purchasing.
  • Matched dye lots.
  • Found inspiration for new projects.
  • Picked up emergency supplies to finish gifts.
  • Connected with fellow makers.

The loss of physical craft stores creates new challenges for everyone who enjoys working with yarn.

Increasingly, makers are finding themselves relying on online retailers to access the supplies they’ve used for years.

Remembering Mary Maxim’s Michigan Roots

For many Michigan makers, Mary Maxim holds a special place in crafting history.

For years, Mary Maxim maintained a physical location in Port Huron, Michigan, serving as a destination for yarn enthusiasts throughout the region.

Many crafters have fond memories of visiting the store, browsing yarn aisles, discovering new patterns, and enjoying the experience of being surrounded by fellow fiber artists.

Today, Mary Maxim operates as an online retailer, adapting to the evolving retail environment just as many other businesses have had to do.

While there is certainly nostalgia attached to having a physical location to visit, their continued online presence provides an important resource for today’s makers.

And that’s where this story takes a hopeful turn.

Where I Finally Found Lily Sugar’n Cream Ecru Cones

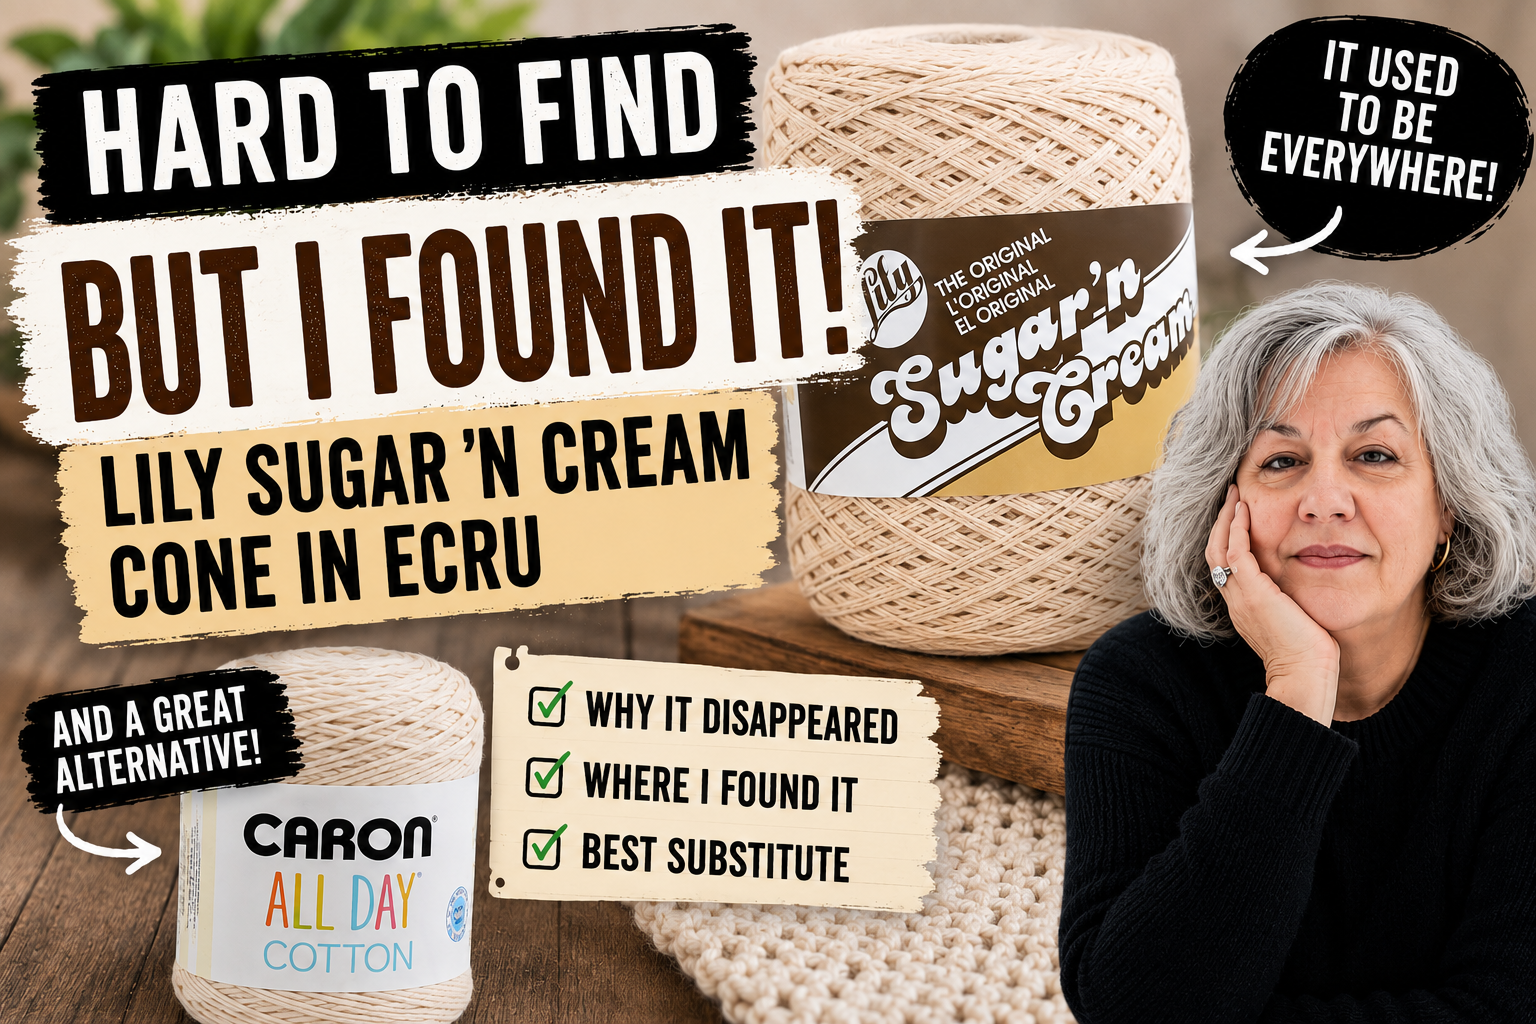
After extensive searching through local stores and online retailers, I was relieved to discover that Mary Maxim Online currently carries Lily Sugar’n Cream Ecru cones.

For anyone who has spent months searching for this specific yarn color, finding a reliable source feels like uncovering hidden treasure.

The purpose of sharing this information isn’t to promote fear buying or encourage excessive stockpiling.

Rather, it’s simply to help fellow crocheters and knitters who have been searching without success.

If you’ve been postponing projects because you couldn’t locate Ecru cones, there may finally be a solution. I did reach out to them and as of date, they assured me that they haven’t received any notice of discontinuation or shortages. They have been blessed with enough ecru for everyone!

Considering Alternatives: Caron All Day Cotton

While many makers prefer sticking with their tried-and-true favorites, it’s always wise to have alternative options available.

One yarn that has caught my attention as a potential substitute is Caron All Day Cotton.

Although no substitute perfectly replicates another yarn’s exact characteristics, having alternatives can be incredibly helpful when availability becomes unpredictable.

Factors to consider when evaluating substitute yarns include:

  • Fiber content
  • Weight classification
  • Texture and softness
  • Stitch definition
  • Project requirements
  • Overall yardage
  • Cost effectiveness

For those unable to find Lily Sugar’n Cream Ecru, Caron All Day Cotton may be worth exploring depending on your specific project needs.

As always, creating a gauge swatch before beginning larger projects is highly recommended when substituting yarns.

Why This Matters to the Crafting Community

To someone outside the crafting world, it might seem unusual to devote so much attention to a single yarn color.

But makers understand.

The supplies we use become part of our creative process. We build patterns around them. We recommend them to friends. We teach beginners using them.

When a trusted product becomes difficult to obtain, it affects more than just shopping convenience.

It impacts:

  • Pattern planning
  • Project consistency
  • Budgeting
  • Teaching resources
  • Creative confidence

Finding reliable access to beloved materials helps preserve the joy of making.

Supporting One Another Through Change

The crafting community has always been remarkably resilient.

We’ve adapted to discontinued yarns, changing dye lots, store closures, rising costs, and evolving trends.

Throughout it all, makers continue sharing information, offering alternatives, and helping one another succeed.

This story isn’t really about a single cone of Ecru yarn.

It’s about community.

It’s about passing along helpful information that may save someone hours of frustration.

It’s about acknowledging that change happens while remaining hopeful that solutions exist.

And perhaps most importantly, it’s about remembering that the heart of crafting has never been found solely in the materials themselves.

It’s found in the creativity, generosity, and connection shared among makers everywhere.
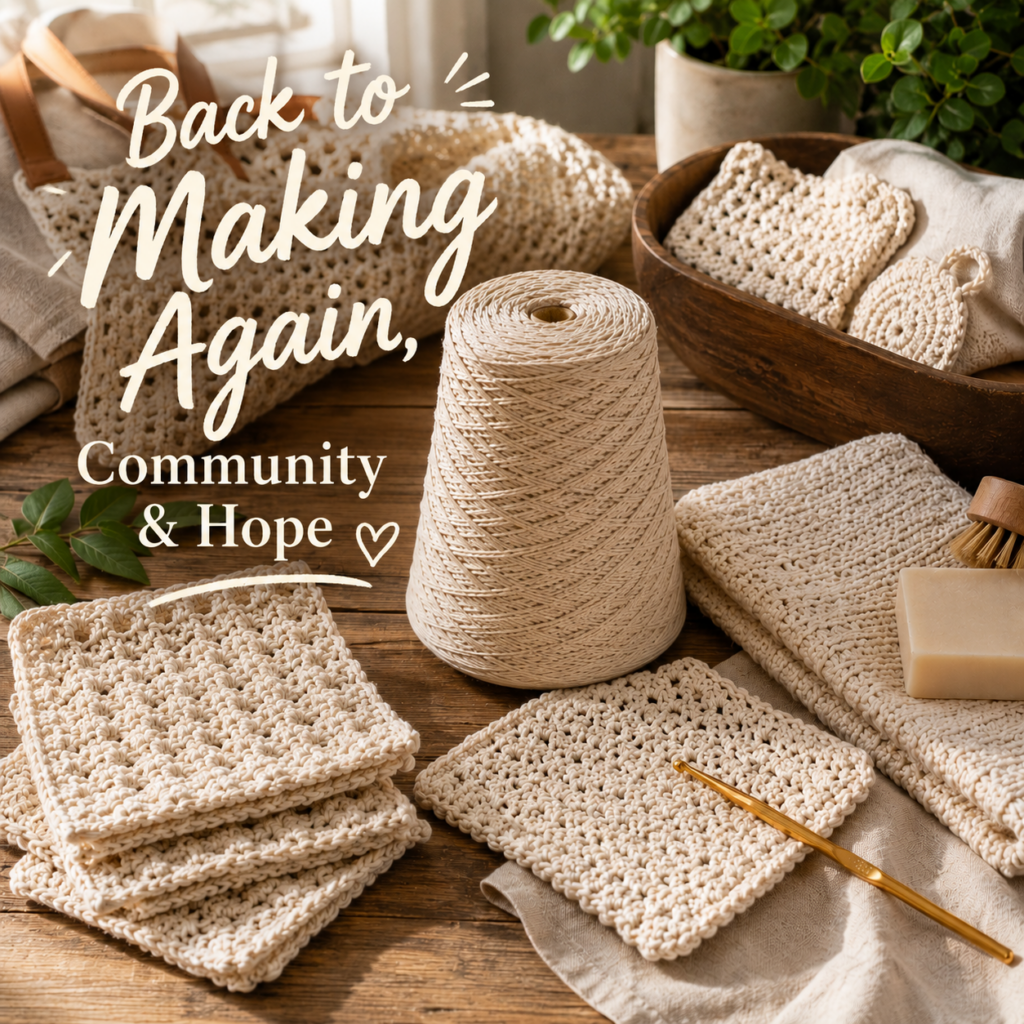
Final Thoughts

If you’ve been searching high and low for Lily Sugar’n Cream Ecru cones, know that you’re certainly not alone.

Many crocheters and knitters have noticed their disappearance from familiar shelves and online marketplaces. While manufacturing transitions and retail changes have created challenges, there are encouraging signs that this beloved staple remains available for those who know where to look.

I was genuinely excited to discover that Mary Maxim currently offers this hard-to-find yarn, and I wanted to share that information with the crafting community.

My hope is that this saves you some time, reduces frustration, and helps you get back to doing what you love most: creating beautiful handmade projects.

Have you been searching for Lily Sugar’n Cream Ecru cones? Have you tried the newer versions of the yarn or discovered alternative sources?

I’d love to hear about your experiences in the comments below. Our shared knowledge helps strengthen this amazing crafting community we all value so much.

Happy crocheting and happy knitting!

WOW, just on week after receiving my yarn, Mary Maxim is out, unbelieveable. I have reached out to them and am awaiting a response…until then
Posted on

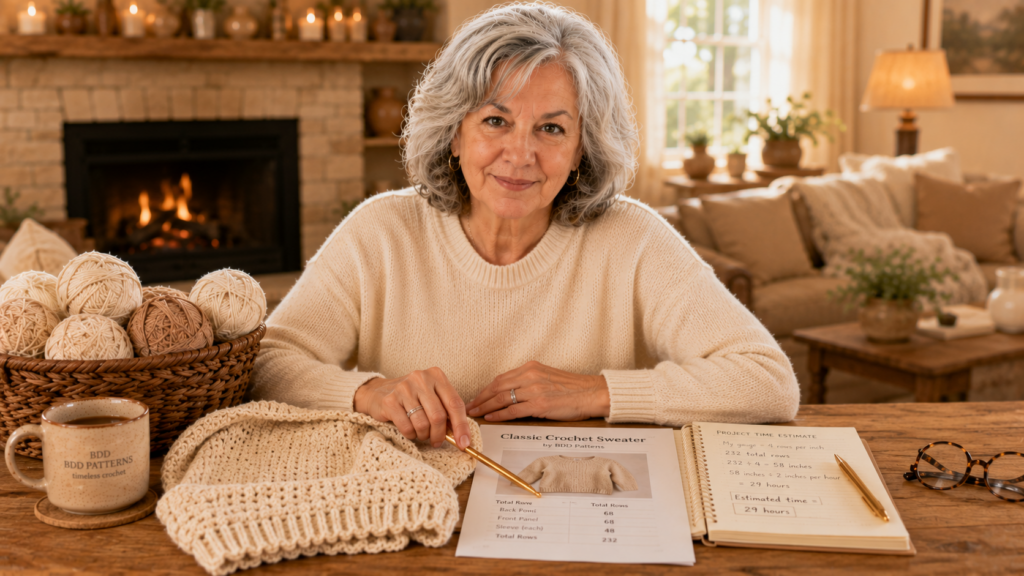
How Long Does a Crochet Project Take? A Simple Way to Estimate Before You Start

how long does a crochet project take?

One of the questions I get asked most often is:

“How long does a crochet project take?”

The truth is, there isn’t one simple answer.

A dishcloth, blanket, sweater, scarf, and baby gift all require different amounts of time. Your yarn choice, stitch pattern, experience level, and available crochet time all play a role in determining how quickly a project comes together.

But here’s the good news:

You don’t need complicated spreadsheets, fancy calculators, or advanced math skills to estimate how long a crochet project will take.

Over the years, I’ve found a simple method that helps me estimate almost any project before I commit to it. Whether I’m planning a crochet sweater, blanket, holiday gift, or home decor project, this method gives me a realistic idea of how much time I’ll need.

Today, I’m sharing exactly how I estimate crochet project time so you can plan your projects with confidence.

Why It’s Helpful to Estimate Crochet Project Time

Many crocheters start projects with the best intentions.

We’ve all done it.

We see a beautiful sweater pattern, buy the yarn, print the pattern, and immediately imagine ourselves wearing it next week.

Then life happens.

Work gets busy.

Family responsibilities pop up.

We get distracted by another project.

Suddenly, that “quick sweater” is still sitting in a project bag three months later.

Estimating crochet project time isn’t about putting pressure on yourself.

It’s about setting realistic expectations.

When you know approximately how long a project will take, you can:

  • Plan handmade gifts more effectively
  • Avoid overcommitting during busy seasons
  • Stay motivated throughout larger projects
  • Choose projects that fit your available time
  • Feel more confident starting ambitious projects

Most importantly, you’ll stop guessing.

The Biggest Mistake Crocheters Make

One of the biggest mistakes I see crocheters make is estimating based on how a project looks.

A simple-looking blanket might take 40 hours.

A complex-looking scarf might only take 6 hours.

The appearance of a project doesn’t always tell you how long it will take to complete.

Instead of guessing based on size or appearance, I prefer to use actual crochet time.

That’s where this simple method comes in.

My Simple Method for Estimating Crochet Project Time

The method is surprisingly simple.

I only need three things:

1. One Completed Row

The first thing I do is crochet one complete row while timing myself.

This gives me a realistic average for the project.

I don’t rush.

I don’t crochet unusually slowly.

I simply work at my normal pace.

For example:

If one row takes me 3 minutes to complete, I write that number down.

one row

2. Total Number of Rows

Next, I look at the pattern.

Most crochet patterns provide row counts, repeat sections, or measurements that help determine approximately how many rows will be required.

Let’s say my sweater front panel requires:

  • 54 rows

Now I have the second number I need.

3. A Little Simple Math

Now I multiply:

3 minutes × 54 rows = 162 minutes

Then I divide by 60:

162 ÷ 60 = 2.7 hours

That means one sweater panel should take approximately 2.7 hours of actual crochet time.

That’s it.

No complicated formulas.

No spreadsheets.

No project management software.

Just one row, total rows, and simple math.

how much time does it take to crochet a sweater

Estimating an Entire Crochet Sweater

Let’s look at a realistic example.

Suppose you’re making a sweater with:

Front Panel

3 minutes × 54 rows

= 162 minutes

= 2.7 hours

Back Panel

3 minutes × 54 rows

= 2.7 hours

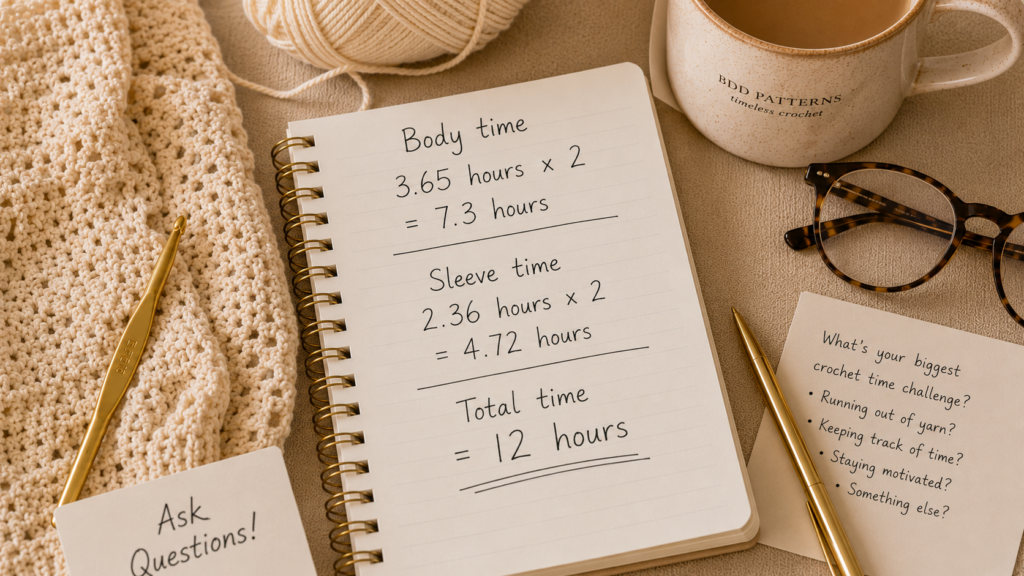
Total Body Time

2.7 + 2.7

= 5.4 hours

Now let’s estimate the sleeves.

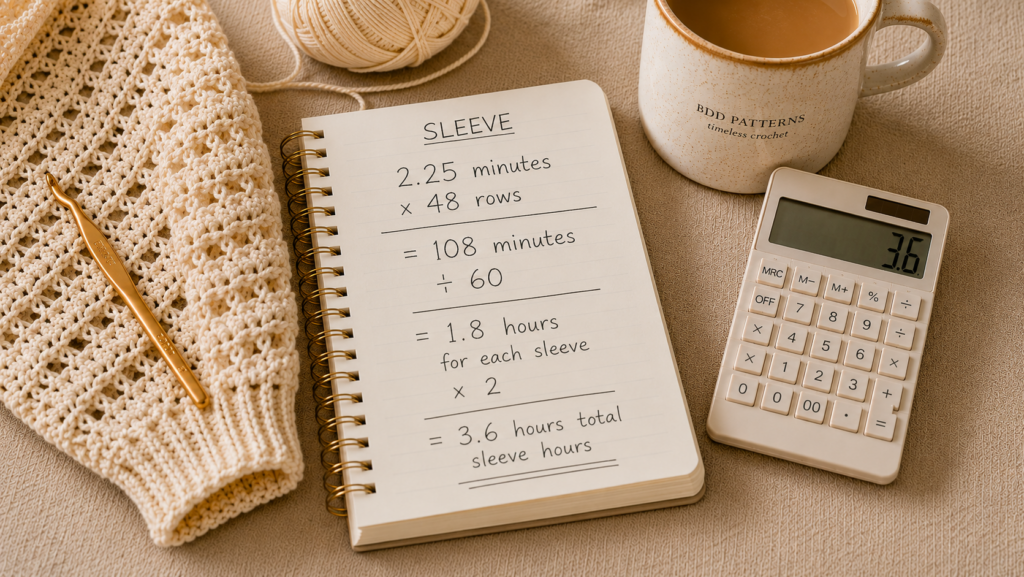
Each Sleeve

2.25 minutes × 48 rows

= 108 minutes

= 1.8 hours

Both Sleeves

1.8 + 1.8

= 3.6 hours

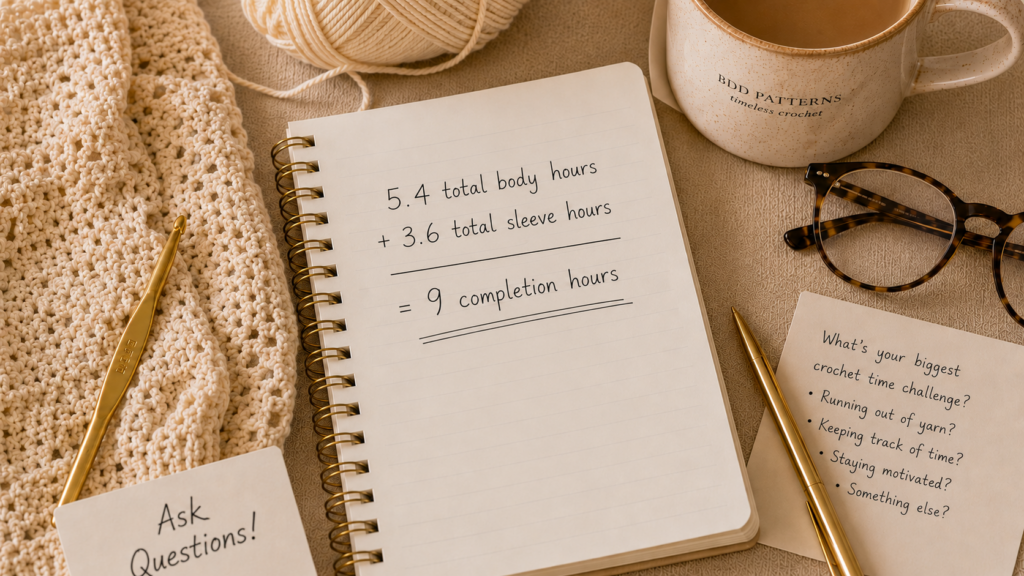
Estimated Sweater Time

5.4 body hours

+ 3.6 sleeve hours

= 9 hours

In this example, the sweater would require approximately 9 hours of actual crochet time.

That’s incredibly useful information before starting a project.

Why I Always Add Buffer Time

Here’s something I’ve learned over many years of crocheting:

Life happens.

We stop for coffee.

We answer phone calls.

We count stitches again.

We rip out rows.

We get interrupted.

The math gives us actual crochet time.

Real life is different.

That’s why I always add an extra 20% to 30% buffer time.

For example:

9 hours × 1.25

= 11.25 hours

Now my estimate is much closer to reality.

This simple adjustment prevents frustration and helps me create more realistic timelines.

How Long Does It Take to Crochet a Blanket?

One of the most searched crochet questions online is:

How long does it take to crochet a blanket?

The answer depends on:

  • Blanket size
  • Yarn weight
  • Stitch pattern
  • Crochet speed
  • Experience level

However, here are some rough estimates.

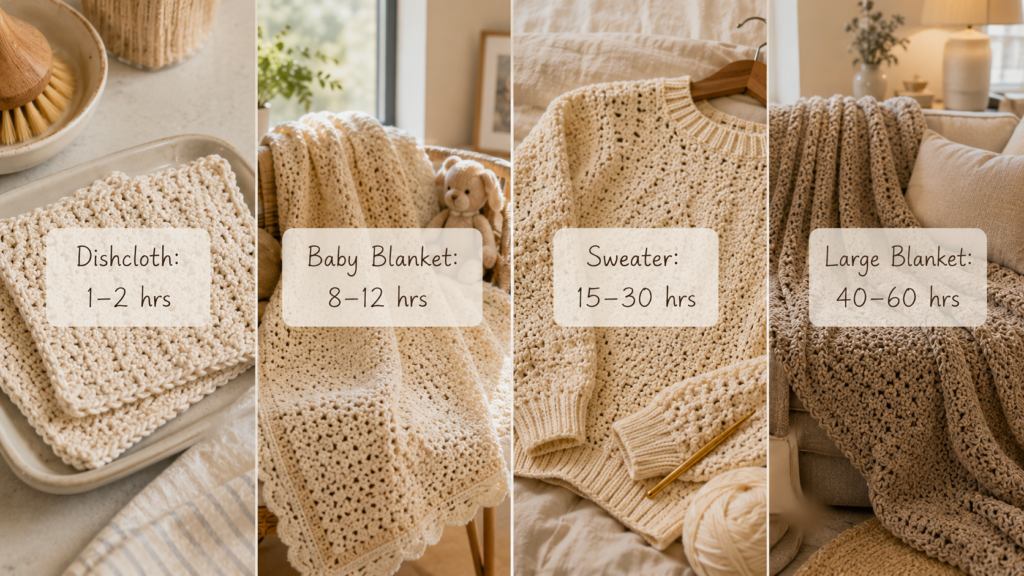
Baby Blanket

Approximately 8–12 hours

Lap Blanket

Approximately 15–25 hours

Throw Blanket

Approximately 25–40 hours

Large Bed Blanket

Approximately 40–60+ hours

Again, these are estimates.

The best approach is always timing one row and calculating from there.

How Long Does It Take to Crochet a Sweater?

Another common question is:

How long does it take to crochet a sweater?

For most adult sweaters:

Beginner-Friendly Sweaters

15–25 hours

Intermediate Sweaters

20–35 hours

Complex Sweaters

30–50+ hours

Factors that affect sweater completion time include:

  • Stitch complexity
  • Size being made
  • Sleeve construction
  • Color changes
  • Seaming requirements

This is exactly why I prefer using my row-timing method.

It provides a project-specific estimate instead of relying on generic averages.

Tools That Help Me Plan Crochet Projects

While you don’t need anything fancy, there are a few tools I find helpful.

Digital Timer

A simple kitchen timer or phone timer works perfectly.

Janet’s Favorite

AVINIA Digital Kitchen Timers, Visual timers Large LED Display Magnetic Countdown Countup Timer for Classroom Cooking Fitness Baking Studying Teaching, Easy for Kids and Seniors Black

  • 【Rotary timer & easy…
  • 【Multiple scenes use…
  • 【Continuous light & …
  • 【Loud alarm & Magnet…

Crochet Notebook

I like keeping a dedicated notebook where I track:

  • Project estimates
  • Yarn usage
  • Pattern notes
  • Modifications
Janet’s Favorite

Crochet Planner 3-Ring Binder 8.5x11'', Organize Your Hooks, Yarn & Patterns, Projects Journal Notebook, Complete Log Book Starter Kit & Great Gift Idea

  • ORGANIZE, PLAN & CREATE – This complete …
  • FULLY CUSTOMIZABLE LAYOUT – Designed in …
  • DURABLE COVER & UNIQUE DESIGN – Crafted …
  • WHAT CAN YOU ISE IT FOR? – Use this croc…

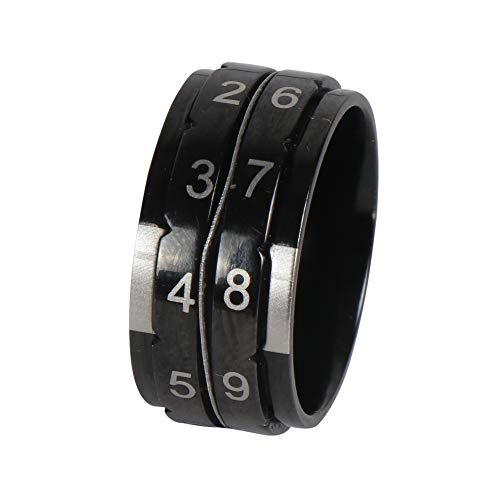
Row Counter

Helpful for larger projects and sweaters.

Janet’s Favorite

KnitPro Row Counter Ring- Black | Size 10 (19.8mm)

  • Available Sizes: KnitPro Row counter rin…
  • Hypoallergenic Row Counter Ring: These r…
  • Easy to use: Simply slide the ring on yo…
  • 2-in-1 Accessory: KnitPro Row Counter Ri…

Ergonomic Crochet Hooks

Comfortable hooks can make long projects much more enjoyable.

Janet’s Favorite

Yarniss Ergonomic Crochet Hooks Set 3.0mm-6.0mm, Aluminum Crochet Needles with Beech Wood Handle for Arthritic Hands

  • Lightweigt Crochet Hooks Set for Beginne…
  • Comfortable Grip for Arthritic Hands:Str…
  • Double Polished Smooth Hook Heads:Every …
  • All-in-One Crochet Kit:Package includes …

What If Your Speed Changes?

This is a great question.

The truth is that crochet speed isn’t always consistent.

You may crochet:

  • Faster during simple stitch repeats
  • Slower during shaping sections
  • Slower when learning a new stitch
  • Faster after gaining experience

That’s perfectly normal.

Remember:

Your estimate doesn’t need to be exact.

It’s simply a planning tool.

Even being within a few hours of the final completion time is incredibly helpful.

Why Some Crocheters Finish Faster Than Others

If you’ve ever wondered why someone else finishes projects much faster than you do, remember:

Everyone crochets differently.

Some crocheters:

  • Crochet daily
  • Use thicker yarns
  • Prefer simple stitches
  • Have decades of experience

Others:

  • Crochet occasionally
  • Use fine yarns
  • Enjoy intricate stitch patterns
  • Are still learning

Neither approach is better.

Crochet isn’t a race.

The goal is enjoying the process while creating something beautiful.

My Favorite Benefit of Estimating Project Time

Beyond planning, my favorite benefit is motivation.

Large projects can feel overwhelming.

A blanket may seem impossible.

A sweater may seem intimidating.

But when I realize:

“This project is only about 10 hours.”

Suddenly it feels achievable.

Even if I only crochet one hour per evening, I know I can finish in about ten days.

That simple shift in perspective makes a huge difference.

Final Thoughts

If you’ve ever wondered how long a crochet project takes, I hope this simple method helps.

Remember:

  • Time one row.
  • Count your rows.
  • Do a little math.
  • Add a buffer.

That’s it.

No spreadsheets.

No complicated formulas.

No guesswork.

Just a simple, practical way to estimate project time before you begin.

Whether you’re planning a crochet sweater, blanket, Christmas gift, or your next favorite project, having a realistic timeline can help you crochet with more confidence and less stress.

And honestly, that’s something every crocheter can appreciate.

Frequently Asked Questions

How long does a crochet project take?

It depends on the project size, stitch pattern, yarn weight, and your crochet speed. The most accurate method is timing one row and multiplying by the total number of rows.

How long does it take to crochet a sweater?

Most adult crochet sweaters take between 15 and 35 hours, although more complex designs may take longer.

How long does it take to crochet a blanket?

Blankets can range from 8 hours for a baby blanket to 60+ hours for a large bed-sized blanket.

Is crocheting faster than knitting?

Generally speaking, crochet tends to work up faster than knitting because the stitches are larger and each stitch is completed individually.

How can I crochet faster?

Practice, ergonomic hooks, comfortable yarn, and familiarity with stitch patterns can all help improve crochet speed over time.

Should I time every crochet project?

You don’t have to, but timing one row can provide valuable insight and help you plan projects more realistically.

Does crochet speed matter?

Not at all. Crochet is a creative hobby, and everyone works at their own pace. Estimating project time is simply a planning tool, not a measure of skill.

Posted on

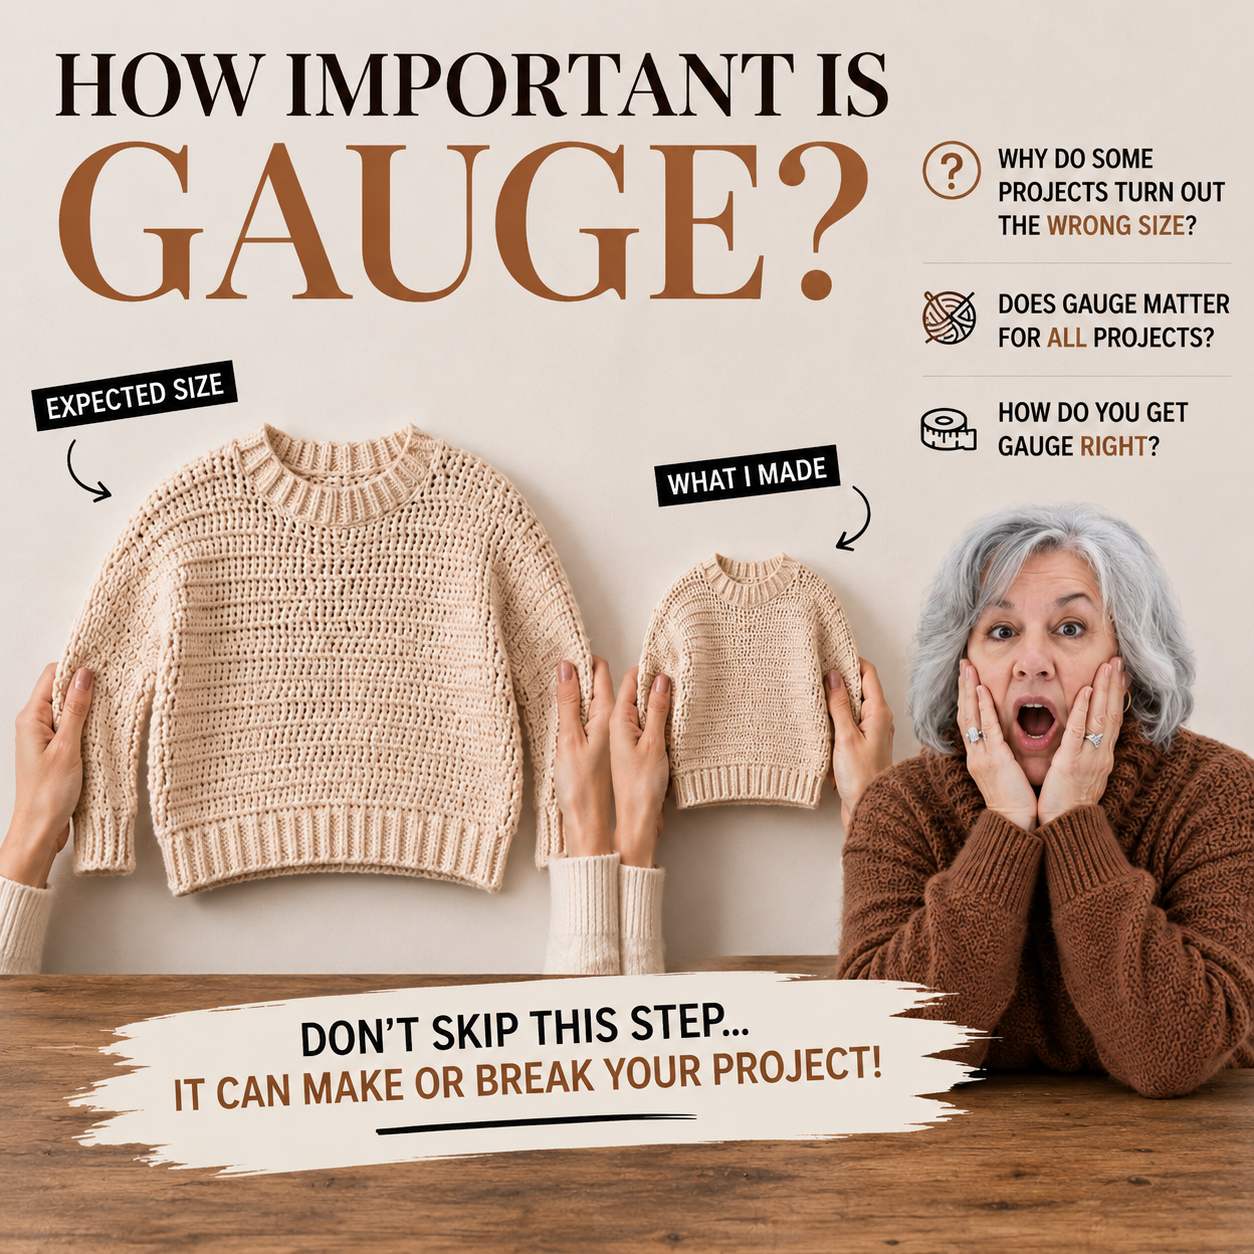
How Important Is Gauge REALLY in Crochet?

how-important-is-gauge-when-crocheting

The Truth Beginners Need to Hear Before Crocheting Garments

If you’ve ever finished a crochet project and thought:

  • “Why is this sweater SO huge?”
  • “Why does this fit my toddler instead of me?”
  • “Why does mine look completely different from the pattern photo?”

…there’s a very good chance the problem was gauge.

Gauge is one of the most misunderstood topics in crochet, especially for beginners. Some crocheters ignore it completely. Others treat it like an intimidating math equation that makes crochet feel complicated before they even start.

But here’s the truth:

Gauge is not meant to frustrate you.
Gauge is meant to SAVE you.

And if you want to crochet garments that actually fit — sweaters, cardigans, tops, dresses, bralettes, pants, or even structured hats — understanding gauge is one of the biggest skills you can learn.

The good news?

You do NOT have to crochet exactly like everyone else to get good results.

You can hold your yarn differently.
You can tension differently.
You can even crochet a little tighter or looser than another person.

What matters is whether your finished fabric matches the intended measurements.

That’s what gauge is really about.

Janet’s Favorite

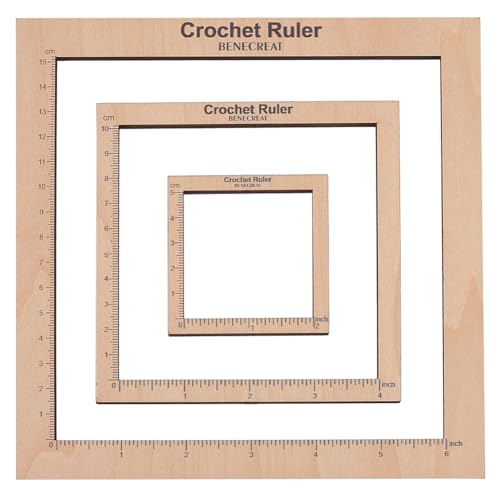
BENECREAT 3 Styles Crochet Ruler Square Ruler Knitting 2" 4" 6" Guide Knitting Tool Sewing Measure Tailor Ruler for Measuring Crochet Accessories

  • Size Reference: 3pcs…
  • Most Applicable: the…
  • Premium Quality: Mad…
  • Perfect 90 Degree: T…

What Is Crochet Gauge?

Gauge is simply the number of stitches and rows that fit into a specific measurement.

Most crochet patterns include something like this:

16 stitches x 12 rows = 4 inches

That means the pattern designer crocheted a swatch using a specific yarn and hook size, then measured it carefully.
If your stitches are:

  • tighter
  • looser
  • taller
  • shorter

…your finished project changes size too.

And sometimes dramatically.

A half-inch difference in gauge can completely change the outcome of a garment.

That sounds scary at first, but once you understand how it works, it actually becomes empowering.

crochet-gauge

Gauge Matters DIFFERENTLY Depending on the Project

This is where a lot of confusion happens online.

You’ll often hear people say:

“Gauge doesn’t matter.”

That statement is only partially true.

Gauge matters differently depending on what you’re making.


When Gauge Is More Forgiving

For projects like:

  • blankets
  • scarves
  • dishcloths
  • shawls
  • oversized wraps

Gauge is usually more flexible.

If your blanket ends up slightly larger?
That’s rarely a disaster.

If your scarf is a little wider?
Probably not a problem.

This is why many beginners start with blankets. They’re forgiving and help build confidence.

Janet Recommends

Forieru Tape Measure, Double Sided Stretchable Vintage Leather Measuring Tape, Body Measuring Tape for Sewing Body Fabric,Tailoring,Knitted Fabric and Handicrafts (Carved)

  • Premium Material: Ta…
  • Automatic Stop And G…
  • Accurate Display Of …
  • Crazy Horse Leather …

When Gauge Matters A LOT

Garments are a completely different story.

Gauge becomes extremely important for:

  • sweaters
  • cardigans
  • fitted tops
  • bralettes
  • dresses
  • pants
  • sleeves
  • hats

Even small differences can create major fit problems.

A sweater can become:

  • too tight
  • too oversized
  • too short
  • too long
  • awkwardly shaped
  • impossible to wear comfortably

And fitted crochet tops?
Those often require very accurate gauge.

A single inch can change the entire fit.

crochet gauge

One of the Biggest Crochet Myths

One of the biggest myths in crochet is this idea that:

“There is only ONE right way to crochet.”

That simply is not true.

Some people:

  • wrap yarn differently
  • hold hooks differently
  • crochet tightly
  • crochet loosely
  • tension yarn in completely unique ways

And honestly?
That’s okay.

The goal is not copying someone’s exact hand movements.

The goal is:

  • correct stitch count
  • correct structure
  • correct measurements

If your finished fabric matches the intended gauge…
you’re doing it correctly.

This mindset is especially important for self-taught crocheters.

You do not need to crochet identically to someone on YouTube to become skilled.

Why Beginners Often Skip Gauge

Many beginners skip gauge because:

  • they’re excited to start
  • it feels boring
  • it looks complicated
  • they think it won’t matter

Unfortunately, skipping gauge often creates MORE frustration later.

There is nothing worse than spending:

  • 12 hours on a sweater
  • expensive yarn
  • tons of effort

…only to realize it doesn’t fit.

A simple 15-minute swatch could have prevented that entire problem.


The Difference Between Tight and Loose Crocheters

Some crocheters naturally crochet tightly.

Others crochet loosely.

Neither is “wrong.”

But it DOES affect project size.

Tight crocheters often create:

  • stiff fabric
  • smaller garments
  • shorter dimensions

Loose crocheters often create:

  • oversized garments
  • drapier fabric
  • longer dimensions

This is why hook size adjustments matter.

How to Fix Your Gauge

Here’s the simple version:

If your gauge is TOO SMALL:
→ go UP a hook size

If your gauge is TOO LARGE:
→ go DOWN a hook size

That’s it.

This is completely normal.

Even experienced crocheters adjust hook sizes regularly depending on:

  • yarn brand
  • fiber type
  • stitch pattern
  • tension
  • desired drape

Professional designers EXPECT crocheters to adjust hooks.

That’s one reason gauge is included in patterns in the first place.


The Best Way to Measure Gauge

The best method is to crochet a swatch larger than 4 inches.

A tiny swatch can give inaccurate results.

Try making:

  • 5–6 inches wide
  • 5–6 inches tall

Then measure the CENTER area only.

Avoid measuring edges because borders and turning chains can distort the measurement.


Blocking Can Affect Gauge Too

Many beginners don’t realize this:
blocking can change gauge.

Some yarn fibers stretch after washing or steaming.

This is especially important for:

  • cotton
  • wool
  • bamboo blends

Always block your swatch the same way you plan to block your finished garment.

That gives you the most accurate results.

Crochet Tools That Make Gauge Easier

Crochet Hook Set

A quality ergonomic crochet hook set makes gauge adjustments much easier because you can quickly switch hook sizes.

Look for:

  • smooth hooks
  • ergonomic handles
  • clearly labeled sizes
Janet’s Favorite

Yarniss Ergonomic Crochet Hooks Set 3.0mm-6.0mm, Aluminum Crochet Needles with Beech Wood Handle for Arthritic Hands

  • Lightweigt Crochet H…
  • Comfortable Grip for…
  • Double Polished Smoo…
  • All-in-One Crochet K…

Stitch Markers

Stitch markers are incredibly helpful when counting stitches in gauge swatches.

Jmuiiu 200Pcs Stitch Markers for Crocheting, Crochet Stitch Marker, Reusable Knitting Markers with Sturdy Metal Storage Box, Essential Craft Tools for Knitting and Crochet Lovers

  • Stitch Markers: Package includes 200PCS …
  • Sturdy Metal Storage Box: Comes with a s…
  • Sturdy Metal Storage Box: Comes with a s…
  • Different Colors: Colorful stitch marker…
  • Wide Applications: Perfect stitch marker…

Blocking Mats

Blocking mats help flatten swatches for accurate measuring.

Sale

CraftyManor 12.5 in Blocking Boards for Crochet Projects with Rose Pattern, Crochet Blocking Board with Pegs, Granny Square Blocking Board with 20 Stainless Steel Pegs, Bamboo

  • 【A Stable & Beautiful Upgrade Of Blockin…
  • 【Standard and Precise Dimensions】:You mu…
  • 【Strict Demands for Quality】:CraftyManor…
  • 【Protective Measure】:If you ask what is …
  • 【Adherence to the Brand Concept】:The Cra…
  • 【Note】:The protective cap comes in a sep…
Janet’s Favorite

Yrangee Blocking Mats for Knitting & Crochet Project,Extra Thick Blocking Boards with Grids for Needlepoint or Crochet,9 Pack Knitting Mats with 150 T-Pins and Storage Bag

  • ✅【Eco-Friendly & Ext…
  • ✅【Fit for All Projec…
  • ✅【Waterproof & Steam…
  • ✅【Perfect Storage Ba…

Yarn Bowl

A yarn bowl helps maintain even tension while crocheting.

Janet’s Favorite

Large Wooden Yarn Bowls for Crocheting, Yarn Bowl for Knitting with Anti-Slip Lid, Crochet Bowl Storage Organizer, 11.3" x 5.5" x 5.2" Oval, Polished Surface, Anti-Tangle, Holds 4-6 Yarn Balls

  • 【ANTI-SLIP LID FOR S…
  • 【ULTRA-SMOOTH POLISH…
  • 【UNIQUE ANTI-TANGLE …
  • 【SPACIOUS CAPACITY F…

The Emotional Side of Gauge

Honestly?
Gauge frustrates people because it feels like failure.

But it’s actually the opposite.

Gauge is information.

It’s simply telling you:

“Here’s how YOUR hands crochet.”

That’s incredibly valuable.

Once you understand your personal crochet tension, your confidence grows dramatically.

You stop guessing.

You stop hoping garments fit.

You start creating intentionally.

And that’s one of the biggest turning points in crochet.


Confidence Comes From Understanding

A lot of beginners think skilled crocheters never struggle with gauge.

That’s not true.

Experienced crocheters:

  • swatch
  • adjust hooks
  • re-measure
  • block
  • test fabric drape

That’s part of the process.

Gauge is not a sign you’re bad at crochet.

Gauge is part of learning how YOUR crochet behaves.


Final Thoughts: So… Is Gauge Important?

For blankets?
Sometimes less.

For garments?
Absolutely yes.

If you want:

  • sweaters that fit
  • tops that shape correctly
  • sleeves the right length
  • wearable crochet garments

…gauge matters.

But remember this:

You do NOT have to crochet exactly like someone else to be “doing it right.”

Crochet is incredibly personal.

Different hands create different tension.

Different tension creates different gauge.

And once you learn how to work with YOUR gauge instead of fighting it…
everything becomes easier.

That’s when crochet starts feeling less frustrating…
and much more enjoyable.

As an Amazon Affiliate, Janet earns small commissions on qualifying purchases.

Posted on

Crochet For Absolute Beginners

how-to-crochet-for-absolute beginners

Everything You Need to Start Crocheting With Confidence

This post may contain affiliate links, which means we may earn a small commission at no extra cost to you. We only recommend products we genuinely love and would use ourselves.

There’s something almost magical about crochet.

A simple strand of yarn and a single hook can become a cozy blanket, a soft scarf, a handmade gift, or even a future heirloom. Yet for many beginners, crochet can also feel intimidating at first. You may have watched videos, stared at crochet abbreviations, or wondered if your hands were “doing it wrong.”

Here’s the truth:

You do not need to be naturally crafty to learn crochet.

You do not need perfect tension, expensive supplies, or years of experience.

You simply need a willingness to begin.

Whether you are 25 or 75, completely new to yarn crafts, or someone trying again after giving up years ago, this guide will walk you through the basics of crochet in a simple, encouraging way.

And most importantly: yes, you really can learn this.

Why Crochet Has Become So Popular Again

Crochet is no longer just a traditional hobby passed down from grandmothers. It has exploded in popularity again because people are craving slower, calmer, more meaningful activities.

Crochet allows you to:

  • Create beautiful handmade items
  • Reduce stress and anxiety
  • Step away from screens
  • Develop a creative skill
  • Make personalized gifts
  • Create wearable pieces and home decor
  • Build confidence through small accomplishments

For many people, crochet becomes more than a hobby. It becomes a peaceful rhythm in daily life.

And unlike many hobbies, crochet is relatively inexpensive to start.


What You Actually Need to Start Crocheting

One of the biggest beginner mistakes is overbuying supplies before learning the basics.

You do not need an entire craft room to begin.

Here’s all you really need:

  • A crochet hook
  • Yarn
  • Small scissors
  • A yarn needle (optional at first)

That’s it.

Beginner Favorites Janet Recommends

Janet’s Favorite

Yarniss Ergonomic Crochet Hooks Set 3.0mm-6.0mm, Aluminum Crochet Needles with Beech Wood Handle for Arthritic Hands

  • Lightweigt Crochet Hooks Set for Beginne…
  • Comfortable Grip for Arthritic Hands:Str…
  • Double Polished Smooth Hook Heads:Every …
  • All-in-One Crochet Kit:Package includes …
  • Portable & Well Organized:The matched st…
Love This Yarn

Red Heart Soft Wheat Yarn - 3 Pack of 141g/5oz - Acrylic - 4 Medium (Worsted) - 256 Yards - Knitting/Crochet

  • Content: 100% Acrylic. This yarn is grea…
  • Ball Size: Each ball of this #4 Medium G…
  • “Knitting Gauge: 4” x 4” (10 cm x 10 cm)…
  • Red Heart is proud to be America’s Favor…
Janet’s Favorite

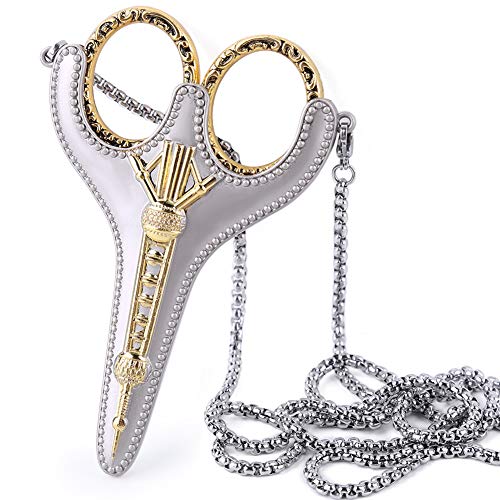
BUTUZE Embroidery Scissors, Exquisite Retro Scissors for Sewing, Stainless Steel Embroidery Sewing DIY Kit for Sewing, Cutting, Art Work, Embroidery, Needlework

  • Sewing Scissors High quality: Made of hi…
  • Embroidery Scissors Advantages: Metal re…
  • Beautiful Shape: Our metal paper scissor…
  • Durable, Top Quality: Provide you with m…

The Best Crochet Hook for Beginners

For most beginners, a medium-sized hook is easiest to learn with.

A great beginner size is:

  • 5.0 mm (H hook)
  • 5.5 mm (I hook)

These sizes are comfortable to hold and large enough to clearly see your stitches. Recommended Beginner Crochet Hooks

A smooth ergonomic hook can help reduce hand strain and make stitches easier to control while learning.

The Best Yarn for Beginners

Avoid very dark yarns, fuzzy yarns, or extremely thin yarns in the beginning.

Instead, choose:

  • Medium weight yarn (#4 worsted weight)
  • Light colors like cream, beige, soft gray, or dusty blue
  • Smooth yarn with visible stitch definition

Cotton blends and acrylic yarns are both excellent beginner options.

Easy-to-See Beginner Yarn Options

When learning crochet, lighter colored yarn with clear stitch definition makes a huge difference.

    Janet’s Favorite

    Caron One Pound Solids Yarn - (4) Medium Worsted Gauge 100% Acrylic - 6 oz - Off White - For Crochet, Knitting & Crafting

    • Content: 100% acrylic yarn, 4 worst weig…

    Caron All Day Cotton - 3 Pack of 173 Yards/3.52 oz Cream 100% Mercerized Cotton Yarn

    $49
    • Content: 100% mercerized cotton, Care: T…
    • Ball Size: 100g/3.52 oz, 158 m/173 yds, …
    • Knitting Gauge: 4″ x 4″ (10cm x 10cm) 20…
    • Caron yarn takes color inspiration from …
    Janet’s Favorite

    Lion Brand Yarn, Hue + Me Chunky Yarn for Crocheting, Knitting, and Crafts, Desert, 3 Pack

    • SOFT KNITTING YARN: Envisioned by Two of…
    • CROCHETING YARN: This blend is 80% acryl…
    • CHECK YOUR GAUGE: Knit stitches needed f…
    • EASY-CARE YARN: Items made from this woo…

    Understanding Crochet Hooks

    One of the first things beginners notice is that crochet hooks come in many sizes and materials.

    You’ll find:

    • Aluminum hooks
    • Wooden hooks
    • Ergonomic hooks
    • Plastic hooks
    • Steel hooks

    At first, this can feel overwhelming.

    But here’s the good news:

    The exact hook is far less important than simply becoming comfortable holding one.

    Many beginners think there is only one “correct” way to hold a crochet hook. That simply is not true.

    Some people hold their hook like a pencil. Others hold it like a knife.

    Both are correct.

    The goal is not perfection.

    The goal is comfort and stitch consistency.

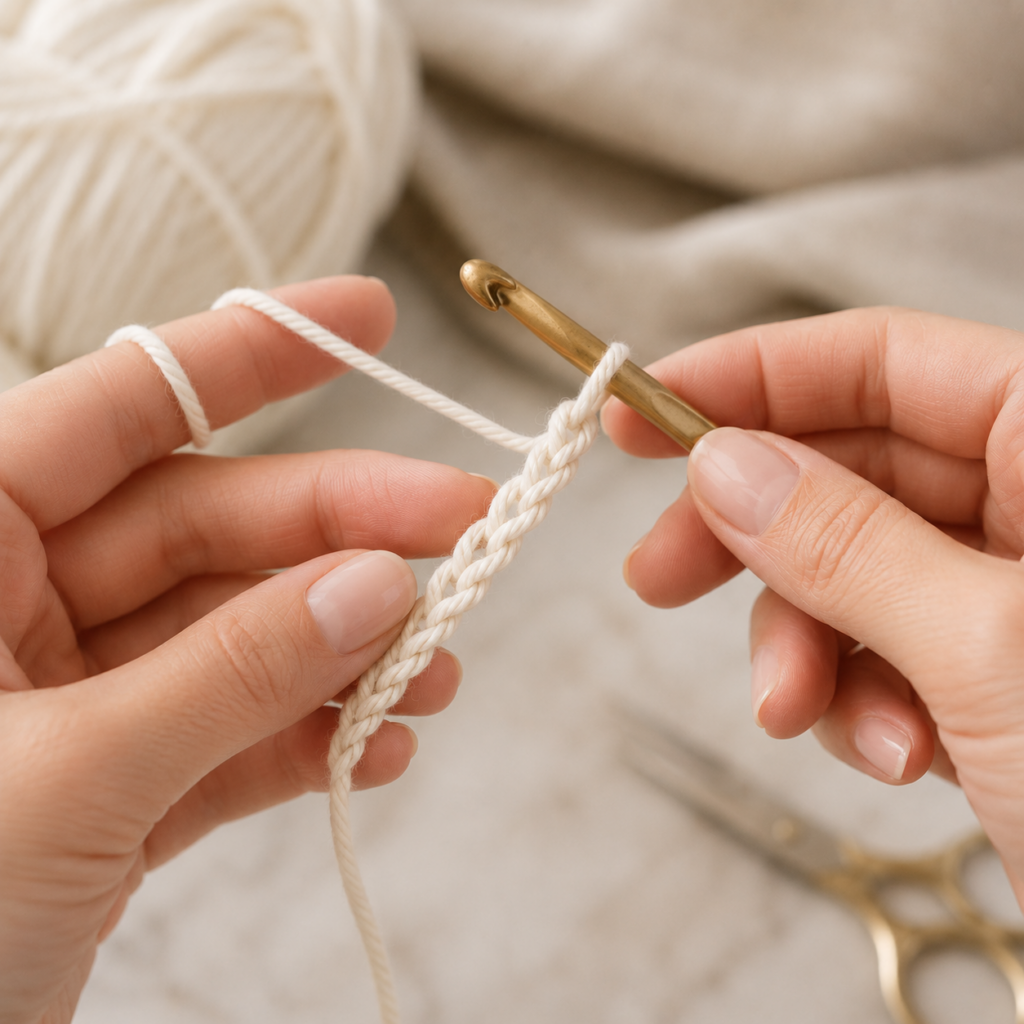
    This is something we will cover more deeply in the upcoming YouTube beginner series, starting with:

    • How to hold a crochet hook
    • How to make your first chain

    These two skills are the true foundation of crochet.

    The First Thing You’ll Learn: The Chain Stitch

    Every crocheter remembers their first chain.

    The chain stitch is usually the first stitch beginners learn because it teaches:

    • Hand positioning
    • Yarn tension
    • Hook control
    • Stitch rhythm

    At first, your chains may look:

    • Too tight
    • Too loose
    • Uneven
    • Twisted

    This is completely normal.

    Crochet is muscle memory.

    Your hands are learning a brand-new movement pattern, and that takes repetition.

    Most beginners improve dramatically after just a few practice sessions.

    The Biggest Beginner Crochet Mistakes

    Every beginner struggles in the beginning.

    The difference between people who succeed and people who quit is usually very simple:

    Successful beginners keep going through the awkward phase.

    Here are some of the most common beginner mistakes.

    1. Pulling the Yarn Too Tight

    This is probably the number one beginner issue.

    When stitches are too tight:

    • The hook becomes hard to insert
    • Hands become sore
    • Projects curl
    • Crochet becomes frustrating

    Relax your hands.

    Your stitches do not need to be perfect.

    2. Counting Incorrectly

    Many beginners accidentally add or lose stitches.

    This is normal.

    Even experienced crocheters occasionally miscount.

    Learning to count stitches is a skill that develops over time.

    3. Choosing Difficult Yarn

    Beginners often buy fuzzy or decorative yarn because it looks beautiful.

    Unfortunately, these yarns hide stitches and make learning much harder.

    Simple yarn is your friend in the beginning.

    4. Comparing Yourself to Experts

    One of the fastest ways to quit crochet is to compare your first chain to someone else’s ten years of experience.

    Every skilled crocheter was once a beginner.

    Every single one.

    My Favorite Aluminum Hooks

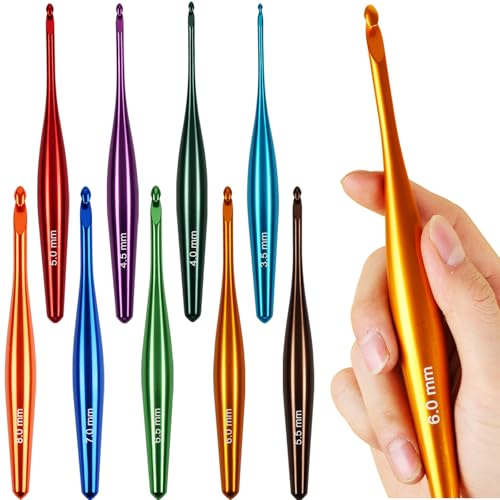
    Svartur Crochet Hooks Ergonomic, 9Pcs Hand-Polished Aluminum Crochet Needles (3.5mm-8mm), Streamline Crochet Hooks for Arthritic Hands, Multicolored Metal Knitting Needles with Storage Case

    • 【Premium Material & …
    • 【Ergonomic Comfort C…
    • 【Wide Range of Sizes…
    • 【Durability & Qualit…

    Glocusent Book Light, 3-Color & 6-Brightness Reading Light, Bendable Neck Light, 80-hr Lasting Rechargeable Book Light, Perfect Reading Lights for Books in Bed, Knitting, Repairing, Book Lovers Gifts

    • [3 Colors & 6 Brightness Adjustable] Thi…
    • [Rechargeable & Long-Lasting] This bed r…
    • [Ergonomic & Hands-Free Design] The arms…
    • [Partner Friendly & Versatile] Unlike ot…
    Janet’s Favorite

    Copper Compression Arthritis Gloves | Fingerless Arthritis Carpal Tunnel Pain Relief for Men & Women | Hand Support Wrist Brace for Neuropathy, Rheumatoid, Tendonitis, Swelling, Crocheting, Typing (L)

    • FIND THE STRENGTH TO…
    • COPPER INFUSED FIBER…
    • AVAILABLE IN 5 SIZES…
    • EASY TO CARE FOR. Th…

    Crochet Is About Progress, Not Perfection

    One of the beautiful things about crochet is that improvement is visible.

    Your first rows may wobble.

    Your tension may change.

    Your edges may lean sideways.

    And then suddenly one day, your stitches begin to look consistent.
    Your hands relax.

    Your rhythm develops.

    You stop thinking about every movement.

    That transformation happens through practice, not perfection.

    The Best Beginner Crochet Projects

    Many beginners make the mistake of starting with projects that are too advanced.

    Start simple.

    Simple projects build confidence.

    Dishcloths

    Dishcloths are excellent beginner projects because:

    • They are small
    • They work up quickly
    • Mistakes are not noticeable
    • You practice basic stitches repeatedly

    Scarves

    Scarves are another fantastic starting point.

    You mainly practice:

    • Rows
    • Stitch consistency
    • Tension

    Plus, scarves are forgiving.

    Blankets

    Simple blankets are wonderful beginner projects because they teach repetition and rhythm.

    Large blankets may seem intimidating, but many are simply the same stitches repeated over and over.

    A blanket can actually become relaxing once you understand the basics.

    Why Many Beginners Quit Too Early

    Crochet has a learning curve.

    The first few days can feel frustrating because your brain and hands are trying to coordinate new movements simultaneously.

    This stage is temporary.

    Most beginners quit right before things begin to click.

    If you feel discouraged, remember:

    • Your hands are learning
    • Uneven stitches are normal
    • Tension improves naturally
    • Speed comes later

    You are not failing.

    You are learning.


    Crochet Terminology Beginners Should Know

    When you first look at a crochet pattern, it may feel like another language.
    Here are a few common beginner terms:

    • ch = chain
    • sc = single crochet
    • dc = double crochet
    • sl st = slip stitch
    • st = stitch

    At first, abbreviations can look intimidating.

    But after a little practice, reading patterns becomes much easier.

    In the beginning, video tutorials are incredibly helpful because you can watch each movement step-by-step.

    That’s why our beginner crochet YouTube series will start with the true foundations before moving into larger projects.

    Building Confidence as a Beginner Crocheter

    Confidence in crochet does not come from perfection.

    It comes from finishing things.

    Even small things.

    Your first uneven dishcloth matters.

    Your crooked scarf matters.

    Your wobbly rows matter.

    Because every finished project teaches you something.

    Crochet is not about being perfect immediately.

    It is about learning one small skill at a time.

    And once those skills stack together, you suddenly realize:

    You can actually make beautiful things.


    A Gentle Reminder for Beginners

    If you are learning crochet later in life, please do not believe the lie that it is “too late” to start.

    Many people begin crochet:

    • After retirement
    • During difficult seasons
    • While healing from stress
    • While searching for a creative outlet
    • Simply because they always wanted to try

    Creativity does not have an age limit.

    Your hands do not need to move perfectly.

    You do not need natural talent.

    You simply need patience with yourself.

    And while crochet may seem small to some people, there is something deeply meaningful about learning to create with your hands again.

    Crochet Can Become More Than a Hobby

    For some people, crochet remains a relaxing pastime.

    For others, it becomes:

    • A creative outlet
    • A side income
    • A handmade gift business
    • A meaningful daily routine
    • A source of peace and accomplishment

    Many crocheters discover that crochet slows the mind in the best possible way.

    The repetitive motion can feel calming and grounding after a stressful day.

    There is also something deeply satisfying about creating something tangible in a fast-moving digital world.

    The Importance of Learning the Foundations Correctly

    One reason beginners become frustrated is because they try advanced projects too early.

    Before jumping into:

    • Sweaters
    • Wearables
    • Complex stitches
    • Fancy yarns

    …it’s important to build strong foundations first.

    That’s exactly why our upcoming beginner crochet series will begin with:

    1. How to hold a crochet hook
    2. How to make your first chain
    3. Understanding tension
    4. Your first stitches
    5. Simple beginner projects

    These foundational skills make everything else easier later.

    And once you master them, the world of crochet opens up dramatically.


    Final Thoughts: You Are Capable of Learning Crochet

    If you take nothing else from this article, remember this:

    You do not need to crochet perfectly to be a crocheter.

    You simply need to begin.

    Every skilled crocheter once struggled with:

    • Tight chains
    • Uneven rows
    • Confusing stitches
    • Hand tension
    • Frustration

    The difference is that they kept practicing.

    And you can too.

    Crochet is learned one stitch at a time.

    One row at a time.

    One small project at a time.

    So pick up the hook.

    Practice the chain.

    Allow yourself to be a beginner.

    Because somewhere between that first uneven stitch and your future handmade blanket, you may discover a hobby that brings creativity, peace, confidence, and joy into your everyday life.

    And honestly?

    That first chain is where it all begins.

    Posted on

    Bonnet No. 1: A Timeless Crochet Baby Bonnet Pattern for Every Stage

    baby-bonnet-no-1-crochet-pattern

    A Timeless Crochet Baby Bonnet Pattern for Every Stage


    A Simple, Timeless Bonnet You’ll Reach for Again and Again

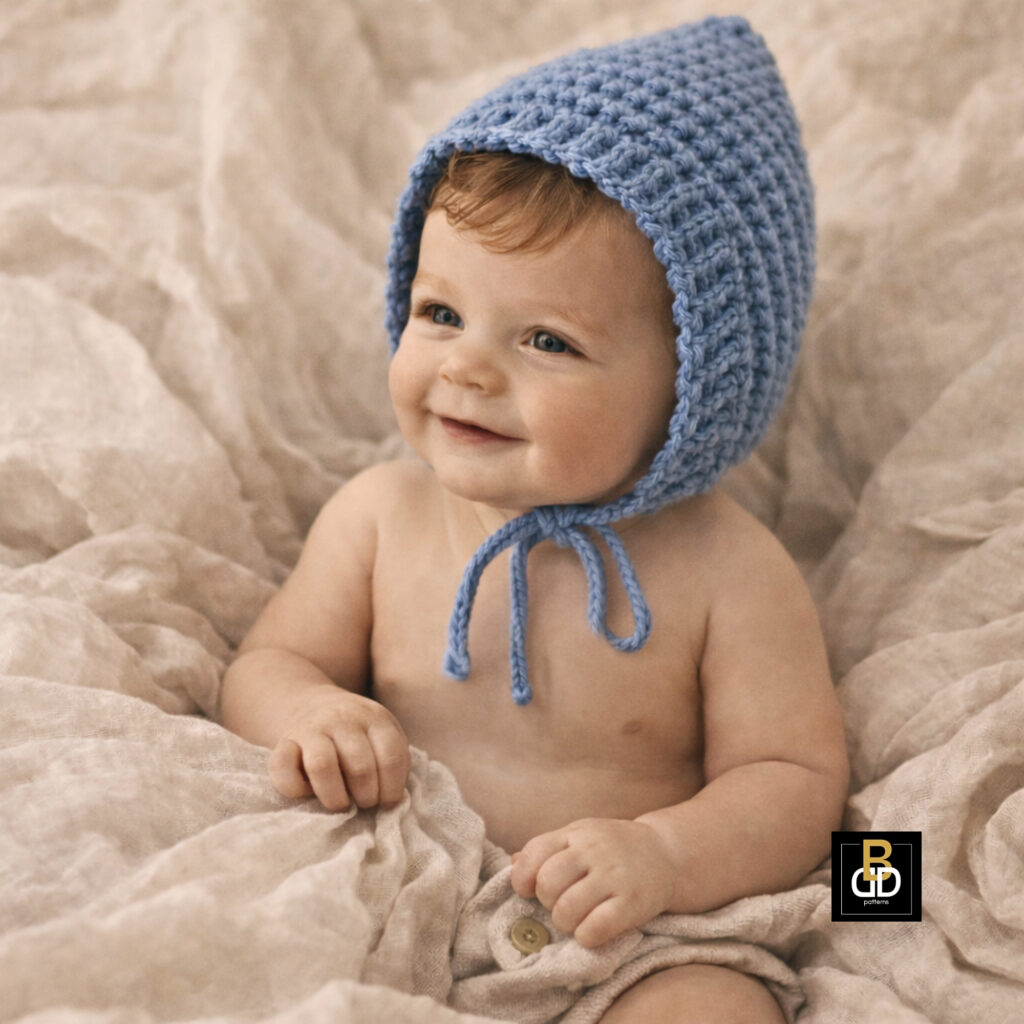
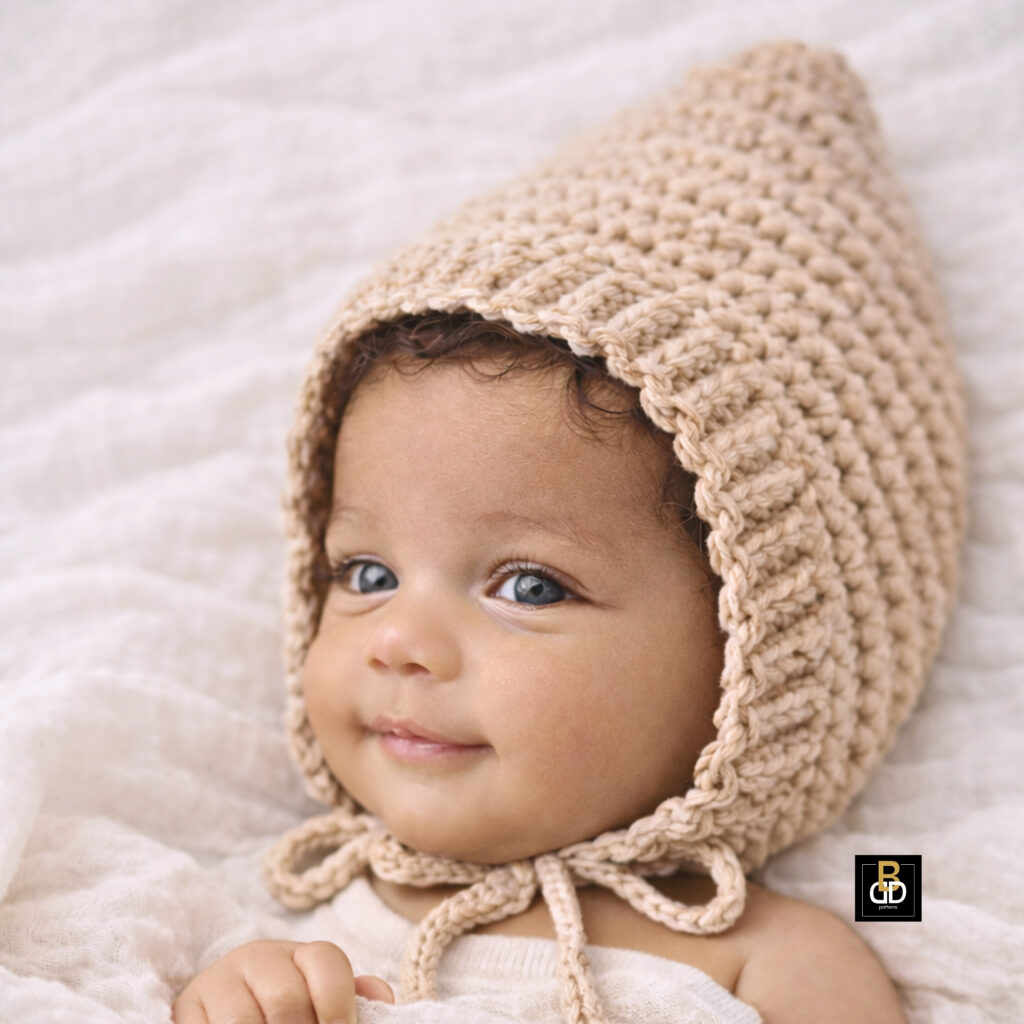
    There is something undeniably special about a handmade baby bonnet. It carries a softness—not just in the yarn, but in the intention behind every stitch. Whether you are crocheting for your own little one, a grandbaby, or a thoughtful gift, Bonnet No. 1 is designed to be that go-to pattern you return to over and over again.

    This bonnet is the perfect blend of simplicity and elegance. With clean lines, classic texture, and a soft drape, it feels both modern and heirloom-worthy. It’s the kind of piece that looks just as beautiful in a newborn photo as it does on a wiggly 12-month-old exploring the world.

    And the best part?

    You can make it in about one hour.

    Watch the FREE You Tube Tutorial here


    Why You’ll Love Bonnet No. 1

    If you’re looking for a crochet project that is both satisfying and practical, this is it.

    ✨ Beginner-Friendly by Design

    This pattern uses only:

    • Single crochet (sc)
    • Slip stitch (sl st)
    • Back loop only single crochet (BLO sc)

    No complicated shaping. No overwhelming instructions. Just simple, rhythmic stitches that build something beautiful.

    ⏱️ A True One-Hour Project

    Need a last-minute baby gift?
    Want something you can finish in one sitting?

    Bonnet No. 1 was created with real life in mind. It’s quick, efficient, and perfect for those moments when you want to create something meaningful without committing to a long project.

    🎁 Perfect for Gifting

    This bonnet makes an ideal:

    • Baby shower gift
    • Newborn photo prop
    • Handmade keepsake

    Pair it with a soft blanket or a simple outfit, and you have a gift that feels thoughtful, elevated, and personal.


    Sizes Included (Newborn to 12 Months)

    One of the most versatile features of Bonnet No. 1 is that it grows with baby.

    The pattern includes sizes for:

    • Newborn
    • 0–3 months
    • 3–6 months
    • 6–9 months
    • 12 months
    baby-bonnet-no-1-crochet-pattern

    This means you can:

    • Make multiple sizes for your own baby
    • Create matching bonnets for siblings
    • Offer a range of sizes if you sell finished pieces

    It’s a pattern that keeps giving long after the first make.


    A Modern Heirloom Look

    There’s a quiet beauty in simplicity.

    The texture created with back loop only single crochet gives this bonnet a subtle, elevated look—structured, yet soft. The ties add just the right amount of detail without overwhelming the design.

    This is not a trendy piece.
    It’s a timeless one.

    It’s the kind of bonnet that looks just as appropriate today as it will years from now in a keepsake box or passed down to the next generation.


    Yarn + Tools (Simple and Accessible)

    Janet’s Favorite

    Caron All Day Cotton - 3 Pack of 173 Yards/3.52 oz Cream 100% Mercerized Cotton Yarn

    • Content: 100% mercerized cotton, Care: T…
    • Ball Size: 100g/3.52 oz, 158 m/173 yds, …
    • Knitting Gauge: 4″ x 4″ (10cm x 10cm) 20…
    • Caron yarn takes color inspiration from …

    You don’t need anything complicated to create something beautiful.

    Recommended Materials:

    • Soft cotton or cotton-blend yarn (#4 weight works beautifully)
    • Crochet hook appropriate for your yarn
    • Yarn needle
    • Scissors
    Janet’s Favorite

    Knitter's Pride Row Counter Ring-Size 7: 17.3mm Diameter

    • Knitter’s Pride Row Counter Ring-Size 7:…
    • Package height : 1.1 inches
    • Package length : 3.4 inches
    • Package width : 2.7 inches

    Optional (but helpful):

    • Stitch markers
    • Measuring tape

    💡 Try this: Choose a neutral color like cream, beige, or soft blue for a classic look—or make several in different tones for a cohesive collection.

    Yarniss Ergonomic Crochet Hooks Set 3.0mm-6.0mm, Aluminum Crochet Needles with Beech Wood Handle for Arthritic Hands

    • Lightweigt Crochet Hooks Set for Beginne…
    • Comfortable Grip for Arthritic Hands:Str…
    • Double Polished Smooth Hook Heads:Every …
    • All-in-One Crochet Kit:Package includes …

    The Beauty of Repetition

    One of the most enjoyable parts of this pattern is the rhythm.

    Once you get started, the stitches flow naturally:

    • Insert hook
    • Yarn over
    • Pull through
    • Repeat

    There’s something calming about that repetition. It gives you space to slow down, to breathe, and to create with intention.

    This is more than just a pattern—it’s a moment of quiet creativity in a busy world.

    Janet’s Favorite

    Aoswep - Cute Giraffe + Zebra With Floral Print Long Sleeve Baby Girl Clothes White Jumpsuit For Baby One-Piece Romper

    • ❤Material: Cotton & spandex, comfortable…
    • ❤Pattern Type: Lovely giraffe, zebra, fl…
    • ❤Design: Snap button on the bottom of th…
    • ❤Available Size: Suitable for baby girl …

    Styling Your Finished Bonnet

    This bonnet is incredibly versatile when it comes to styling.

    For Newborn Photos:

    • Pair with soft linen wraps
    • Use neutral tones for a luxury, editorial feel
    • Let the bonnet be the focal point
    Janet’s Favorite

    Aoswep - Lovely Little Peanuts Elephant Printed Baby Jumpsuit (3-6 Months)

    • Material: Cotton & spandex, comfortable …
    • Pattern Type: Cute full “I love dad, i l…
    • Design: Snap buttons on the front of the…
    • Season: Suitable for daily wear, birthda…

    For Everyday Wear:

    • Style with a simple onesie
    • Add a cozy cardigan
    • Keep it effortless and soft

    For Gifting:

    • Fold neatly and wrap with twine
    • Include a handwritten note
    • Pair with a matching accessory

    💡 Try this: Create a small set in multiple sizes and gift it as a “grow-with-me” bundle. It’s thoughtful, practical, and unforgettable.


    baby-bonnet-crochet-pattern

    Why Handmade Still Matters

    In a world filled with fast, disposable items, handmade pieces stand apart.

    When you crochet something by hand:

    • You slow down
    • You pay attention
    • You create something that lasts

    Bonnet No. 1 is a reminder that simple things—done with care—can be the most meaningful.

    It doesn’t have to be complicated to be beautiful.


    Watch the Full Tutorial

    If you prefer to learn visually, or just want a little extra guidance, I’ve created a full step-by-step video tutorial to walk you through the process.

    👉 Watch the YouTube Tutorial Here

    Whether you’re a visual learner or just want to crochet along, this will help you feel confident from start to finish.


    Get the Pattern

    Ready to make your own?

    👉 Get Bonnet No. 1 Crochet Pattern Here

    Inside, you’ll find:

    • All sizes (newborn through 12 months)
    • Clear, beginner-friendly instructions
    • A pattern you can return to again and again

    A Gentle Encouragement

    If you’re new to crochet, let this be your reminder:

    You don’t have to be perfect to create something beautiful.

    Every stitch you make is part of the process.
    Every project you finish builds your confidence.

    And sometimes, the simplest patterns become the ones you treasure the most.


    Reflective Note

    There’s something special about creating with your hands—especially when it’s for someone you love.

    Bonnet No. 1 is more than just a quick project. It’s a small, meaningful way to care, to give, and to create something lasting in a world that moves so quickly.

    Whether you’re making one or many, for your family or for others, know that what you’re creating matters.

    And that’s always worth the time.


    Now it’s your turn.
    Pick your yarn, grab your hook, and start your first (or next) Bonnet No. 1.

    You might be surprised how often you come back to it 🤍

    baby-bonnet-crochet-pattern
    Posted on

    The Right Way to Crochet (and Why There Isn’t Just One)

    the right way to crochet

    Finding confidence, freedom, and joy in your stitches


    If you’ve ever been told…

    • “You crochet weird.”
    • “That’s not the right way.”
    • “I can’t follow you—you’re doing it wrong.”

    …then this post is for you.

    Because I’ve heard those same words too.

    And if I’m being honest? The first feeling is a quick flash of anger.
    But right after that… it turns into something else.

    Sadness.

    Not for me—but for the beginner sitting on the other side of the screen, quietly wondering if they’re doing everything wrong… and maybe thinking about quitting.

    And that’s something I will never be okay with.

    the right way to crochet

    Let Me Say This Clearly: There Is Not Just One Right Way to Crochet

    There is a right outcome in crochet.

    But there is not just one right way to get there.

    And that distinction matters more than most people realize.

    Here’s what I believe with my whole heart:

    The right way to crochet is to create the correct stitch structure—but how you get there is personal.

    Janet’s Favorite

    The Complete Book of Crochet Stitch Designs: 500 Classic & Original Patterns (Complete Crochet Designs, 1)

    • Lark Books-Complete Book Of Crochet Stit…

    That means:

    • How you hold your hook ✔
    • How you wrap your yarn ✔
    • How you tension your yarn ✔
    • Whether your yarn goes over or under ✔

    These things are deeply personal.

    They are shaped by:

    • Your hands
    • Your comfort
    • Your coordination
    • Your experience
    • Even how you were first taught (or not taught)

    And that’s exactly what makes crochet… handmade.


    Why This Conversation Matters (Especially for Beginners)

    Most of my audience is:

    • Beginners
    • Self-taught crocheters
    • Women who didn’t grow up with someone showing them the ropes

    And I want to say something directly to you:

    You are not behind. You are not wrong. You are learning.

    Janet’s Favorite

    Yarniss Ergonomic Crochet Hooks Set 3.0mm-6.0mm, Aluminum Crochet Needles with Beech Wood Handle for Arthritic Hands

    • Lightweigt Crochet Hooks Set for Beginner:This practical set of crochet hooks is built with durable aluminum and natural beech wood. The premium dual-material design makes these crochet needles lightweight and easy to hold, ideal daily crochet supplies for all craft lovers.
    • Comfortable Grip for Arthritic Hands:Streamlined ergonomic handles fit hands perfectly. Say goodbye to hand fatigue even after hours of crocheting, friendly for all users.
    • Double Polished Smooth Hook Heads:Every aluminum hook head is double polished to create an ultra-smooth surface. These crochet hooks glide effortlessly through all kinds of yarn without snags, bringing you a fluent and pleasant crocheting experience.
    • All-in-One Crochet Kit:Package includes 7 crochet hooks (3.0mm-6.0mm), 6 knitting needles, 10 stitch markers and 1 felt storage bag, full crochet tools for your craft needs.
    • Portable & Well Organized:The matched storage case keeps all crochet supplies tidy. Compact and portable, suitable for home, travel and gifting to crochet beginners.

    When someone tells you there’s only one “correct” way to crochet, it can feel intimidating.

    It can make you second-guess every stitch.

    It can steal the joy right out of your hands.

    And too often…

    👉 It makes people quit.

    That’s the part that breaks my heart.

    Because crochet should feel:

    • Peaceful
    • Creative
    • Satisfying
    • Encouraging

    Not stressful. Not rigid. Not like you’re being graded.

    frustrated crocheter

    The Truth About Technique: Personal, Not Prescriptive

    Let’s talk about one of the biggest debates in crochet:

    Yarn Over vs Yarn Under

    You’ve probably seen it.

    Some crocheters wrap their yarn one way…
    Others do it differently.

    And then the comments come:

    • “That’s not right.”
    • “You’re doing it backwards.”
    • “You need to fix that.”

    But here’s the truth:

    In many cases, both methods can produce the same stitch structure.

    Janet’s Favorite

    BENECREAT 3 Styles Crochet Ruler Square Ruler Knitting 2" 4" 6" Guide Knitting Tool Sewing Measure Tailor Ruler for Measuring Crochet Accessories

    • Size Reference: 3pcs 3 sizes. Small: 63.5×63.5x5mm/2.5×2.5×0.2″, inner diameter: 50x50mm/2×2″. Middle: 120x120x5mm/4.7×4.7×0.2″, inner diameter: 101x101mm/4×4″. Large: 185x185x5mm/7.2×7.2×0.2″, inner diameter: 152x152mm/6x6inch
    • Most Applicable: the measurement unit at the bottom is inch, and the centimeter is marked on the left, which makes this ruler apply to most tailors and handicraft producers.
    • Premium Quality: Made of high -quality wood, the surface is smooth and without burrs. The thickness of 5mm is much strong and durable, which can improve efficiency for a long time.
    • Perfect 90 Degree: They can not only measure, but also easily create 90° angle handicraft products. It is essential to ensure the balance of the project.
    • Multifunctional: Clearly marked and multi-functional, you can quickly determine the needle number and yarn size. A perfect multifunctional sewing knitting tool for everyday life.

    If your stitch:

    • Has the correct loops
    • Matches the intended design
    • Looks consistent across your work

    👉 Then you are achieving the correct result.

    Now—does that mean anything goes?

    No.

    There are moments where technique matters more (we’ll talk about that next).
    But in many everyday stitches, the path you take to get there can vary.

    And that’s okay.

    Actually…

    That’s beautiful.


    Where Precision DOES Matter (And Why It’s Important)

    Now let’s bring balance into this conversation.

    Because while crochet is personal…

    👉 It is also a craft with structure.

    And there are non-negotiables.

    1. Gauge Matters

    If a pattern calls for a specific gauge, it’s not a suggestion.

    It affects:

    • Fit
    • Size
    • Drape
    • Overall success of the project

    You can crochet in your own style—but your gauge must match the pattern.


    2. Stitch Count Matters

    Missing or adding stitches will change:

    • Shape
    • Alignment
    • Final outcome

    Freedom in technique does not mean freedom in counting.


    3. Construction Matters

    Patterns are built intentionally.

    Things like:

    • Where increases happen
    • How pieces are joined
    • The order of steps

    👉 These are not optional.


    4. Stitch Structure Matters

    Even if your yarn movement is different…

    The final stitch must still be:

    • Recognizable
    • Functional
    • Consistent

    Janet’s Favorite

    Ninja Luxe Café Pro Series, Espresso Machine, Drip Coffee, Cold Brew, Hot Water, Integrated Tamper, Built-in Grinder, Hands-Free Frother for Cappuccinos, Lattes, Americanos, Dairy or Non-Dairy, ES701

    • 4 MACHINES IN 1: Brew without limits wit…
    • BARISTA ASSIST TECHNOLOGY: Unlock the ul…
    • INTEGRATED TAMPER: Tamp your grounds eas…
    • DUAL FROTH SYSTEM PRO: Unlock more froth…

    So What Does This Mean?

    Bring your personal hand to the process—but respect the structure of the pattern.

    That’s the balance.

    That’s the art.

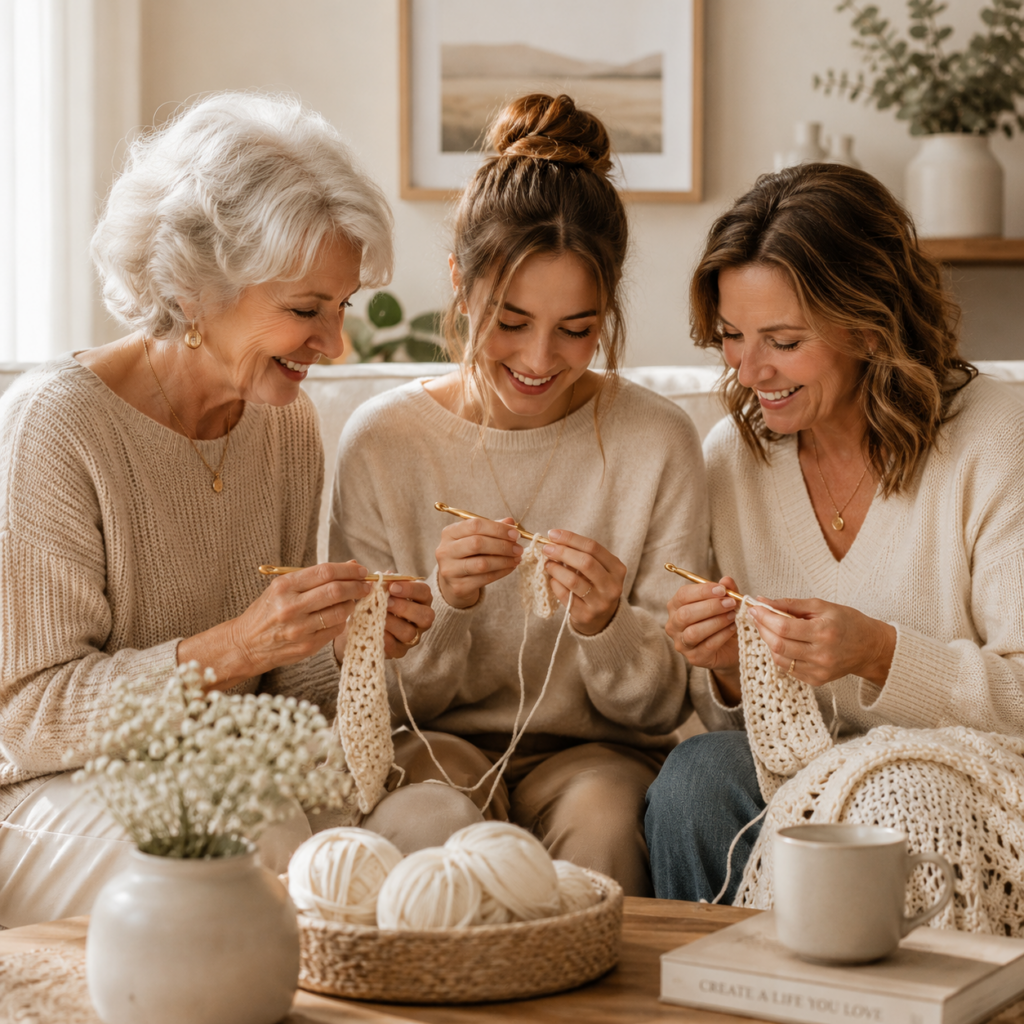
    Grandmother and granddaughter crocheting

    The Essence of Handmade

    Here’s something I want you to really sit with:

    If every crocheter worked exactly the same way… handmade wouldn’t exist.

    It would just be manufacturing.

    The small differences in how we:

    • Hold our hook
    • Move our hands
    • Tension our yarn

    👉 That’s what gives crochet its soul.

    Your stitches carry you in them.

    And no one else can replicate that exactly.


    Let’s Talk About “Persnickity Crocheters”

    You’ve probably encountered them.

    I call them persnickity crocheters.

    They are the ones who:

    • Need to be right
    • Point out “faults” constantly
    • Correct without encouraging
    • Prioritize rules over people

    And I want to be very clear about something:

    That is not the kind of community I am building here.

    Clover Antique Yarn Threader-, 5.1" Height, 2.8" Length x 0.5" Width, Brown

    • Fancy and practical at the same time
    • Novice to expert knitters will enjoy
    • elegance and the usefulness of these too…
    • Designed to easily thread yarn through y…

    I believe in:

    • Encouragement over criticism
    • Teaching over shaming
    • Growth over perfection

    Because here’s the truth:

    When someone feels safe…

    👉 They improve faster.
    👉 They stay longer.
    👉 They enjoy the process.

    And that’s what matters.


    A Gentle Faith Reminder (For the Heart)

    If you’re someone who walks in faith, let me offer you this quiet encouragement:

    “Let everything you do be done in love.” — 1 Corinthians 16:14

    Even in crochet.

    Especially in crochet.

    We are not here to:

    • Tear down
    • Prove superiority
    • Create fear

    We are here to:

    • Build up
    • Encourage
    • Create with joy

    And that includes how we speak to one another—even in something as simple as yarn and a hook.


    What I Want You to Walk Away With

    If you remember nothing else from this post, remember this:

    1. If your stitches look right, you’re doing it right

    The end result matters more than the exact motion.


    2. Consistency matters more than method

    Pick what works for you—and stay consistent.


    3. Crochet should feel peaceful, not stressful

    If it feels heavy, something needs to change.


    4. Your way is not “wrong”—it’s yours

    And that matters.


    5. You are allowed to learn without fear

    You don’t need permission to grow.


    To the Beginner Who Feels Unsure…

    If you’ve ever sat there thinking:

    • “Am I doing this wrong?”
    • “Why does mine look different?”
    • “Maybe I’m just not good at this…”

    Let me say this to you, clearly:

    You are doing better than you think.

    Every crocheter you admire once:

    • Held the hook awkwardly
    • Struggled with tension
    • Frogged projects over and over

    They didn’t quit.

    And neither should you.


    A Final Thought (From Me to You)

    Crochet is not just a skill.

    It’s:

    • A rhythm
    • A comfort
    • A quiet place
    • A form of expression

    And there is room in it for you—exactly as you are.

    So no…

    There is not just one right way to crochet.

    But there is a right way to approach it:

    With patience. With grace. And with joy.

    Happy Crocheter

    Reflective Note

    I believe that the most beautiful things are not made by perfection—but by persistence.

    So pick up your hook.

    Wrap your yarn the way that feels natural.

    And keep going.

    Because your stitches?
    They are already telling a story worth finishing.

    Posted on

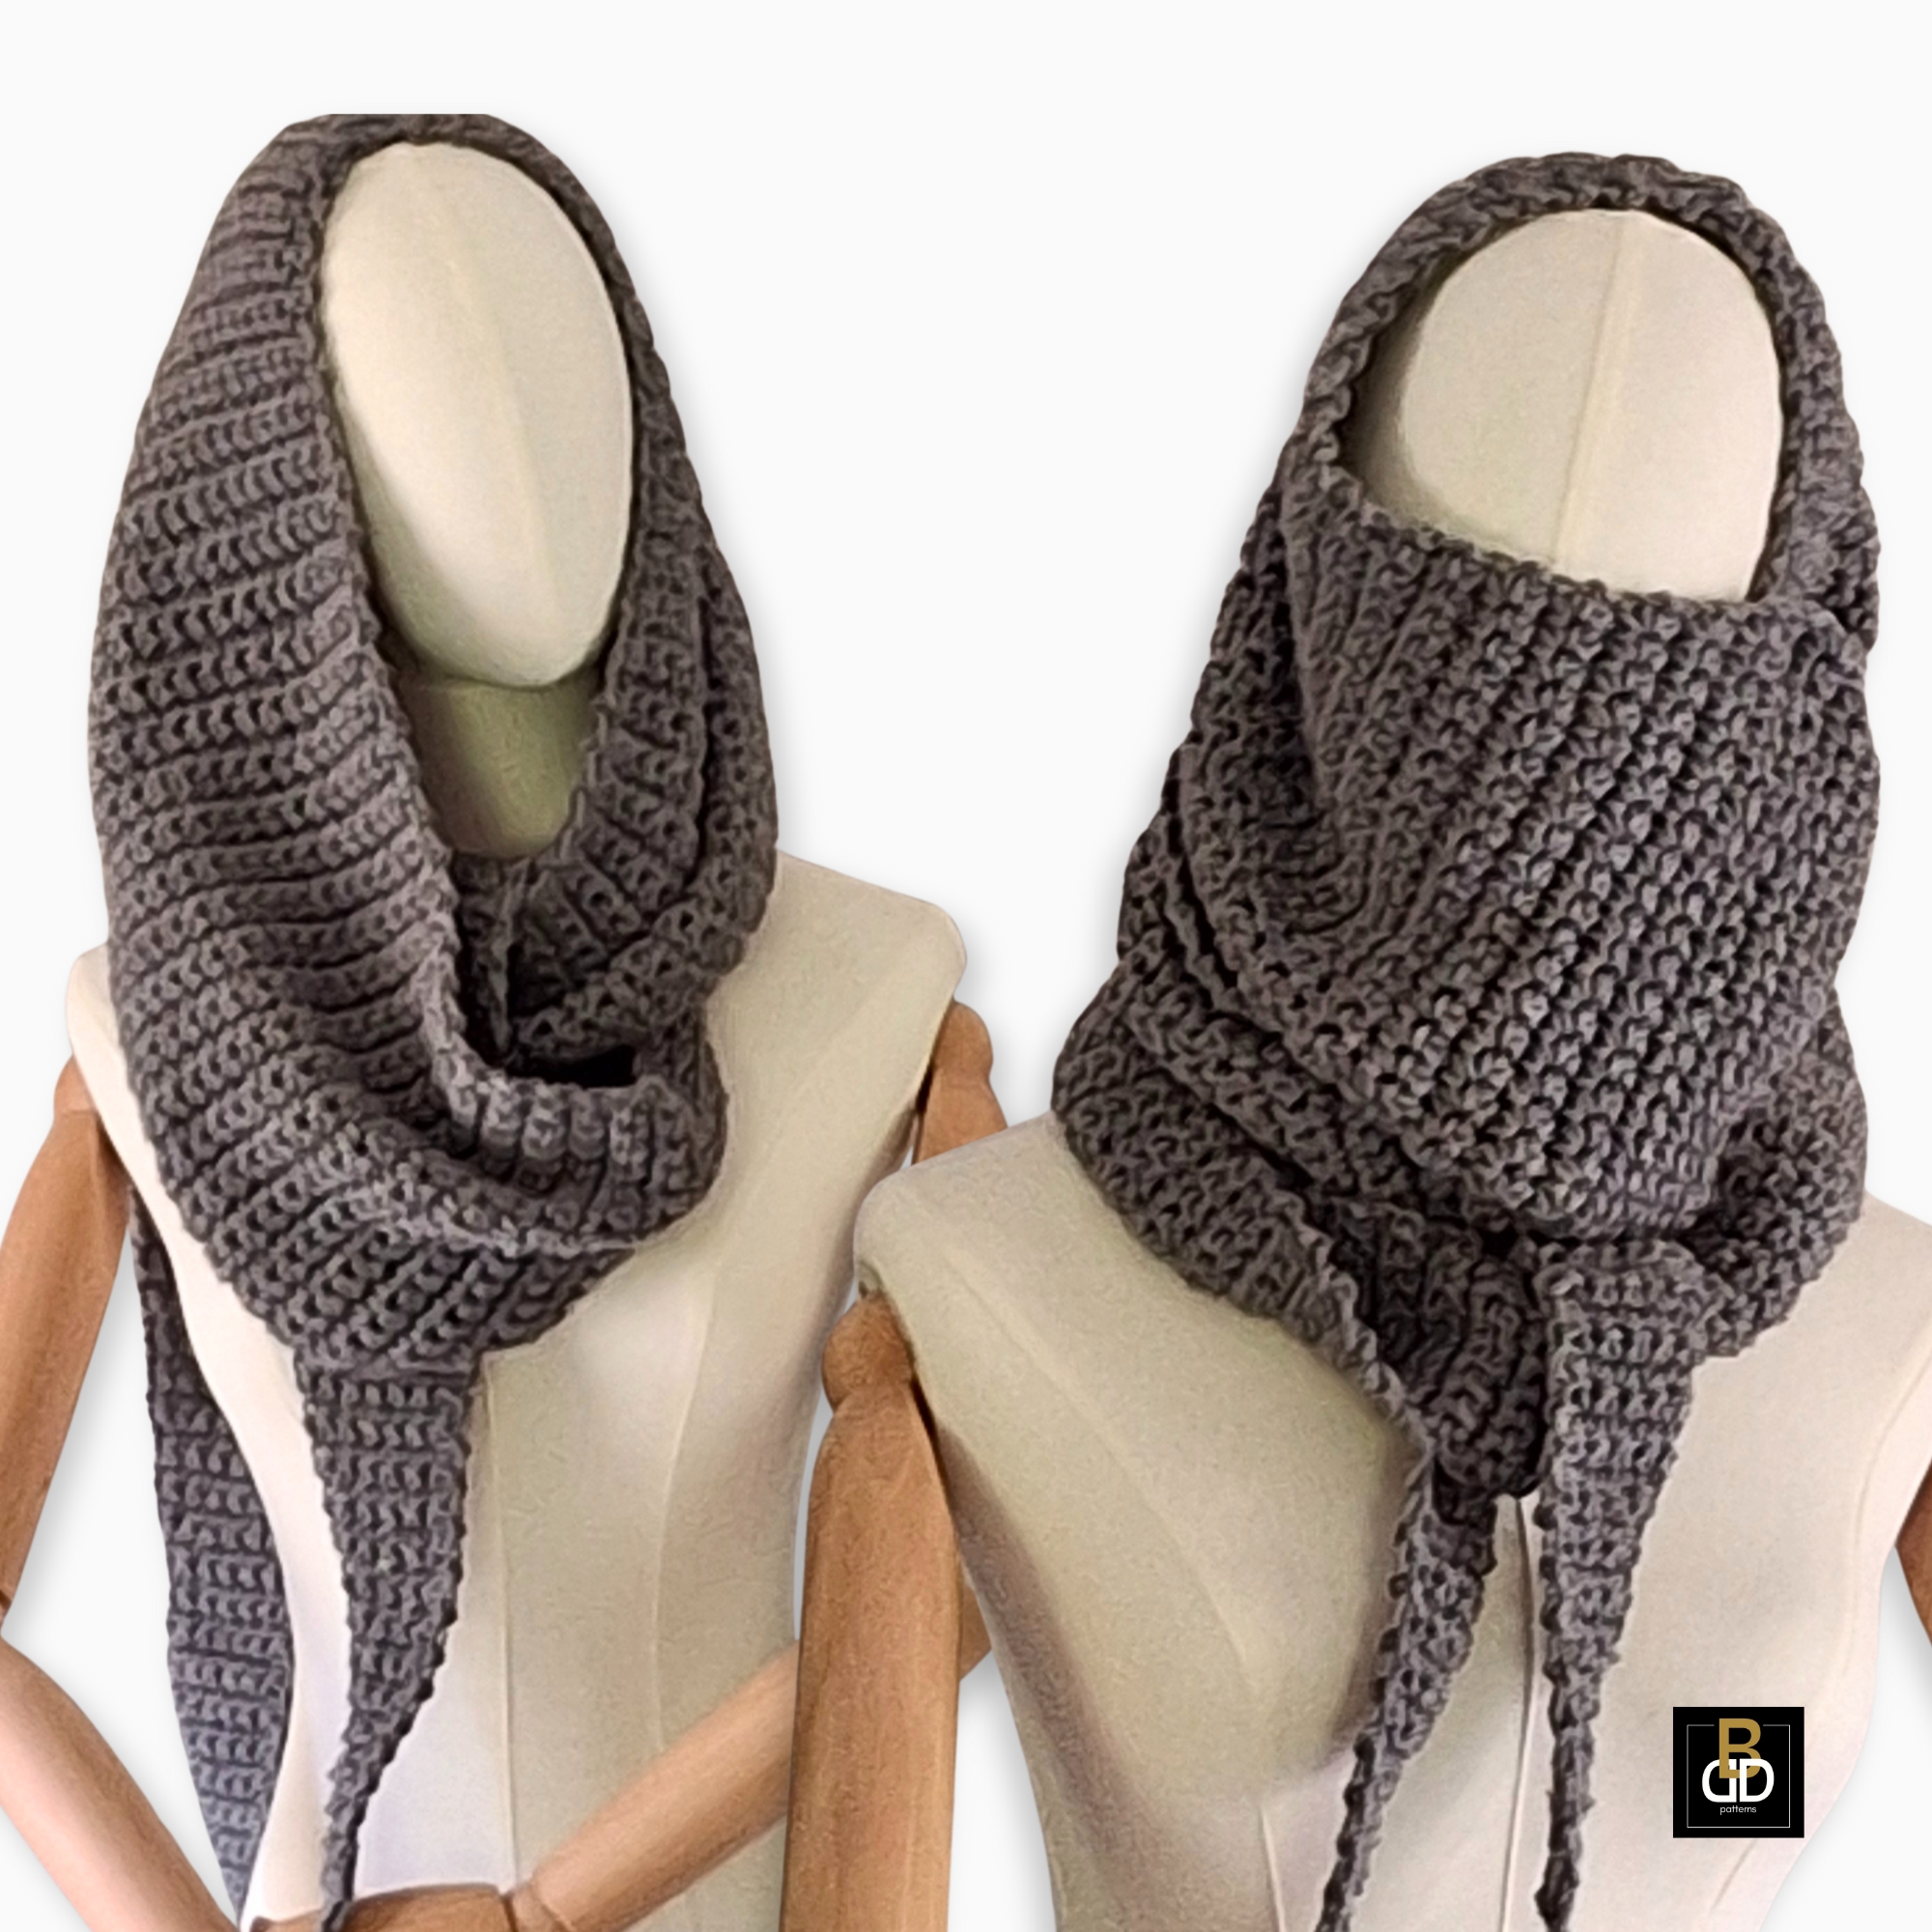
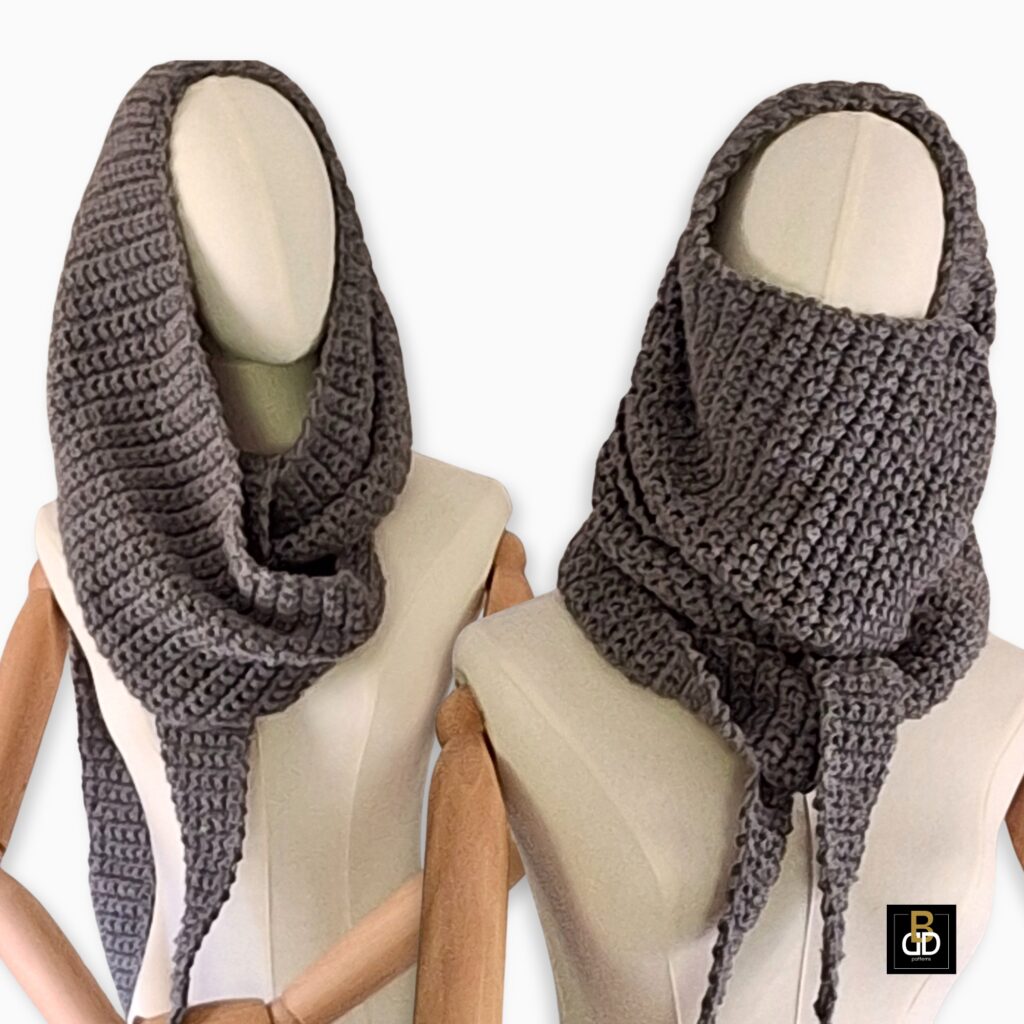
    Crochet Scoodie Pattern: Easy Hooded Scarf Tutorial You Can Make in a Day

    Scoodie Crochet Pattern

    Crochet Scoodie Pattern: Easy Hooded Scarf Tutorial You Can Make in a Day

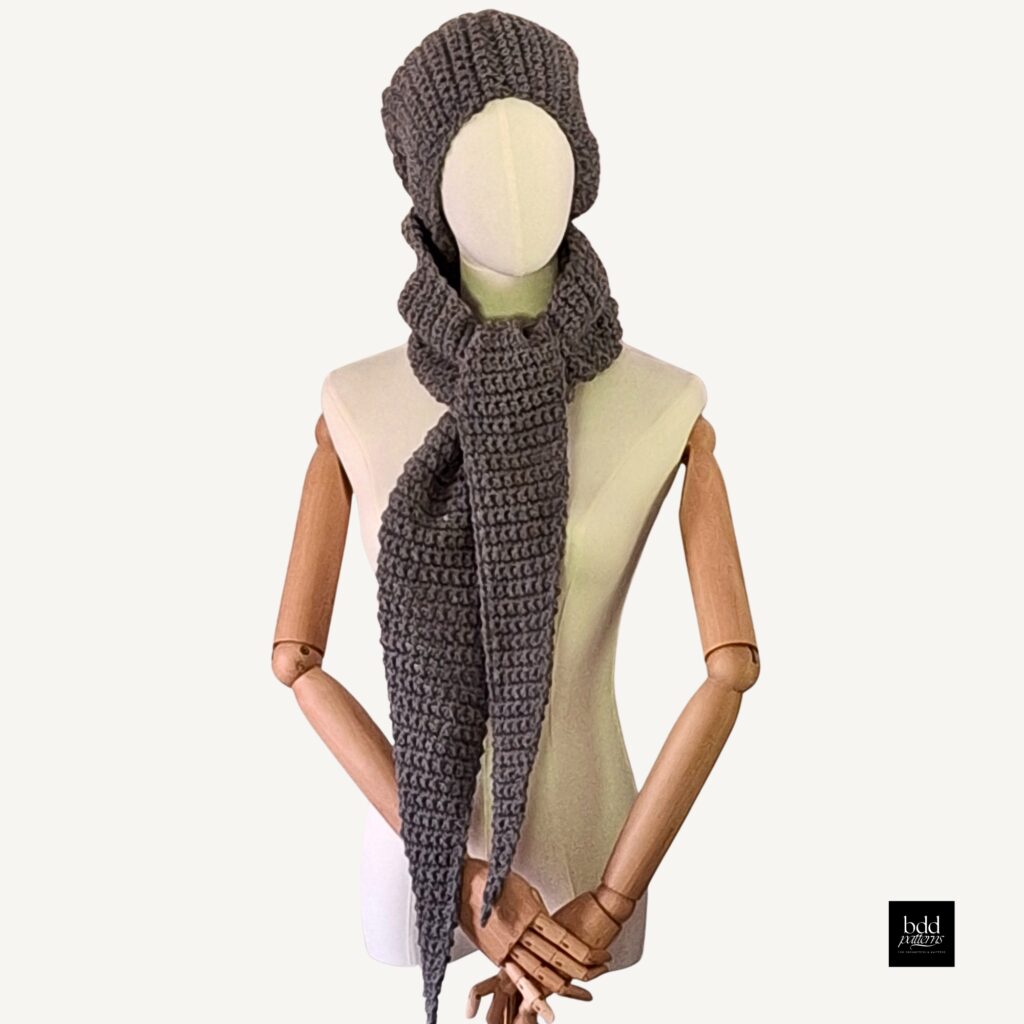
    f you’re searching for a crochet scoodie pattern that’s practical, cozy, and achievable in just a day, you’ll love this design from Janet at BDDPatterns. A scoodie—a hooded scarf—offers the warmth of a hood with the style and function of a scarf. This project is beginner-friendly, uses #4 worsted yarn with a 6mm hook, and grows quickly with simple increases.

    In this blog post, I’ll walk you step-by-step through how to crochet a scoodie that’s worked from tip to top of the hood with an easy repeat. You’ll only need to make two matching panels, seam them together, and you’re ready to stay warm all winter long.

    Materials and Preparation

    Here’s what you’ll need to crochet your scoodie:

    • Worsted Weight Yarn (#4): Soft acrylic or wool blends work well. This yarn weight balances warmth and drape.
    • 6mm Crochet Hook: The perfect size for this stitch pattern, providing both speed and structure.
    • Measuring Tape: To check when your panels reach 45″ long and 14″ wide.
    • Scissors & Tapestry Needle: For finishing and seaming.

    Caron One Pound Solids Yarn, 16oz, Gauge 4 Medium, 100% Acrylic - Grey Mix- For Crochet, Knitting & Crafting ( 1 Piece )

    $16.96
    • Caron One Pound yarn is p…
    • One Pound skein is econom…
    • 100% Acrylic
    • Gauge: 4 – med Worsted
    • Crochet Gauge: 12 sc and …
    • Knitting Gauge: 16 sts an…
    • Ball Size: 16 oz/453.6 g,…
    • Care: Machine wash and dr…

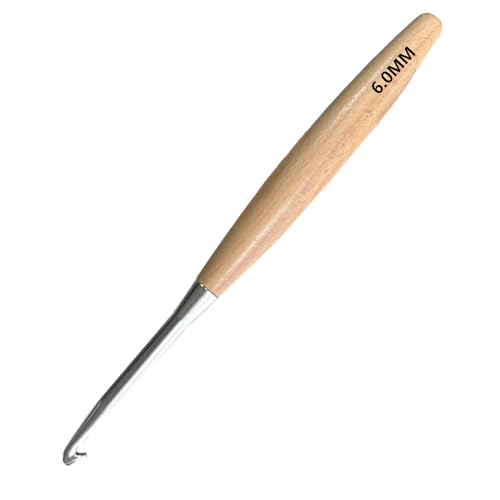
    Beech Wood Crochet Hooks,6mm Ergonomic Handle Crochet Hook Hand DIY Comfortable Smooth Long  Crochet Needle for Crocheting Yarn and Beginners,Experienced Crochet Lovers

    • 【Multiple Sizes】 We have …
    • 【Premium Materials】 Made …
    • 【Ergonomic Handle Design】…
    • 【Smooth Hook Head】 The wo…
    • 【Wide Applications】 Suita…

    Knitter's Pride Row Counter Ring-Size 9: 19.0mm Diameter

    $44.44
    • Knitter’s Pride Row Count…

    AHANDMAKER 2Pcs Wood Knitting Gauge with Yarn Cutter, Square Knitting Needle Gauge Fabric Quilting Ruler Measuring Tool for Sewing Crochet Accessories

    • Package Included:You will…
    • Reliable Material: Made o…
    • Multifunctional Design: T…
    • Accurate Scale: The scale…
    • Widely Applied: The wool …

    BUTUZE Embroidery Scissors, Exquisite Retro Scissors for Sewing, Stainless Steel Embroidery Sewing DIY Kit for Sewing, Cutting, Art Work, Embroidery, Needlework

    $18.98
    • Sewing Scissors High qual…
    • Embroidery Scissors Advan…
    • Beautiful Shape: Our meta…
    • Durable, Top Quality: Pro…
    • Wide Range of Application…

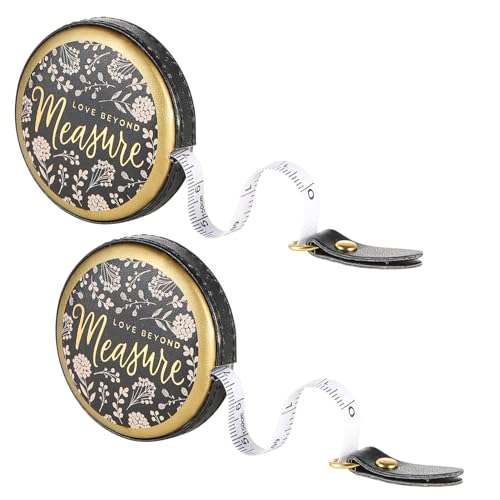
    Soft Tape Measure Retractable Measuring Leather Mini Body Tape Measure Dual Sided Ruler for Tailor Sewing Craft Cloth 2 Pack (Black)

    • Value Pack: You will rece…
    • Quality Material: Dual si…
    • Easy Use: Push button on …
    • Portable: Pocket-sized ta…
    • Widely Used: The leather …

    Sizing Notes

    • Each panel will measure 45″ long by 14″ wide.
    • Panels are worked tip to top with increases every 4th row.
    • Each finished panel has 132 rows plus 2 straight rows at the widest part.
    • Width = 34 single crochet stitches across.

    Step 1: Begin at the Tip

    • Start with a slip knot and chain 2.
    • Work your first row of single crochet (sc) into the chain.
    • This marks the narrow tip of your scoodie panel.

    Step 2: Build the Panel with Increases

    • Continue crocheting in rows of single crochet.
    • Increase every 4th row by adding one stitch at each edge.
    • This gradual increase widens the scarf evenly as you move toward the hood.

    Step 3: Work Until Panel is Full Size

    • Continue until the piece measures about 45″ long and 14″ wide.
    • At this point, you should have about 132 rows completed.
    • Work 2 additional straight rows (no increases) at the widest point to stabilize the width.
    • Your panel should now measure 34 stitches across.

    Step 4: Make a Second Panel

    • Crochet a second panel using the exact same steps.
    • Lay both panels side by side—they should be identical in shape and size.

    Step 5: Join the Panels

    • With right sides facing, seam the two panels together up the back of the hood.
    • You can use whip stitch or slip stitch depending on your preferred look.
    • The joined panels form the hood naturally while leaving scarf tails on each side.

    Step 6: Finish the Edges

    • Work a border of single crochet around the hood opening and scarf edges if desired.
    • This gives the scoodie a clean finish.
    • Optional: Add tassels, fringe, or buttons for flair.

    FAQS

    Q: How many stitches wide is the scoodie?
    A: Each panel is 34 stitches across at the widest part.

    Q: How long does it take to crochet?
    A: With worsted yarn and a 6mm hook, you can finish in about 6–8 hours.

    Q: Can beginners follow this pattern?
    A: Yes! This is an easy crochet hooded scarf pattern using only single crochet stitches.


    Conclusion

    This crochet scoodie pattern is proof that beautiful accessories don’t need to take weeks. By working two panels from tip to top with increases every 4th row, you’ll create a scoodie that’s both cozy and stylish. At just 45″ long by 14″ wide per panel, it’s the perfect weekend—or even one-day—project.

    👉 Watch the full step-by-step video here: Crochet A Scoodie In Just A Day With This Easy Crochet Tutorial

    And don’t forget your supplies before starting:

    • Worsted #4 Yarn
    • 6mm Hook
    • Stitch Markers
    • Measuring Tape & Scissors
    crochet scoodie pattern

    Posted on

    The One-Row Waffle Stitch Blanket That Doubles As A Car Seat Cover

    Waffle Stitch Blanket Crochet Pattern

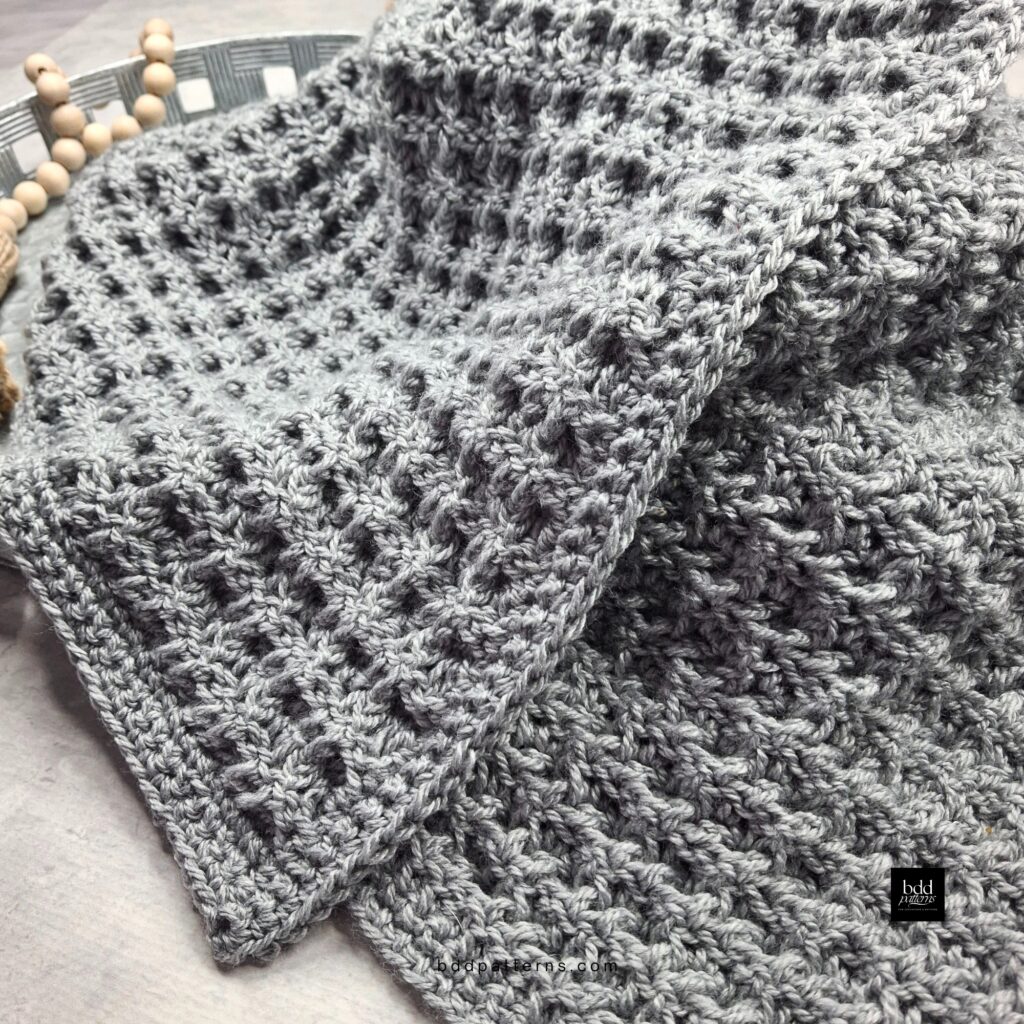
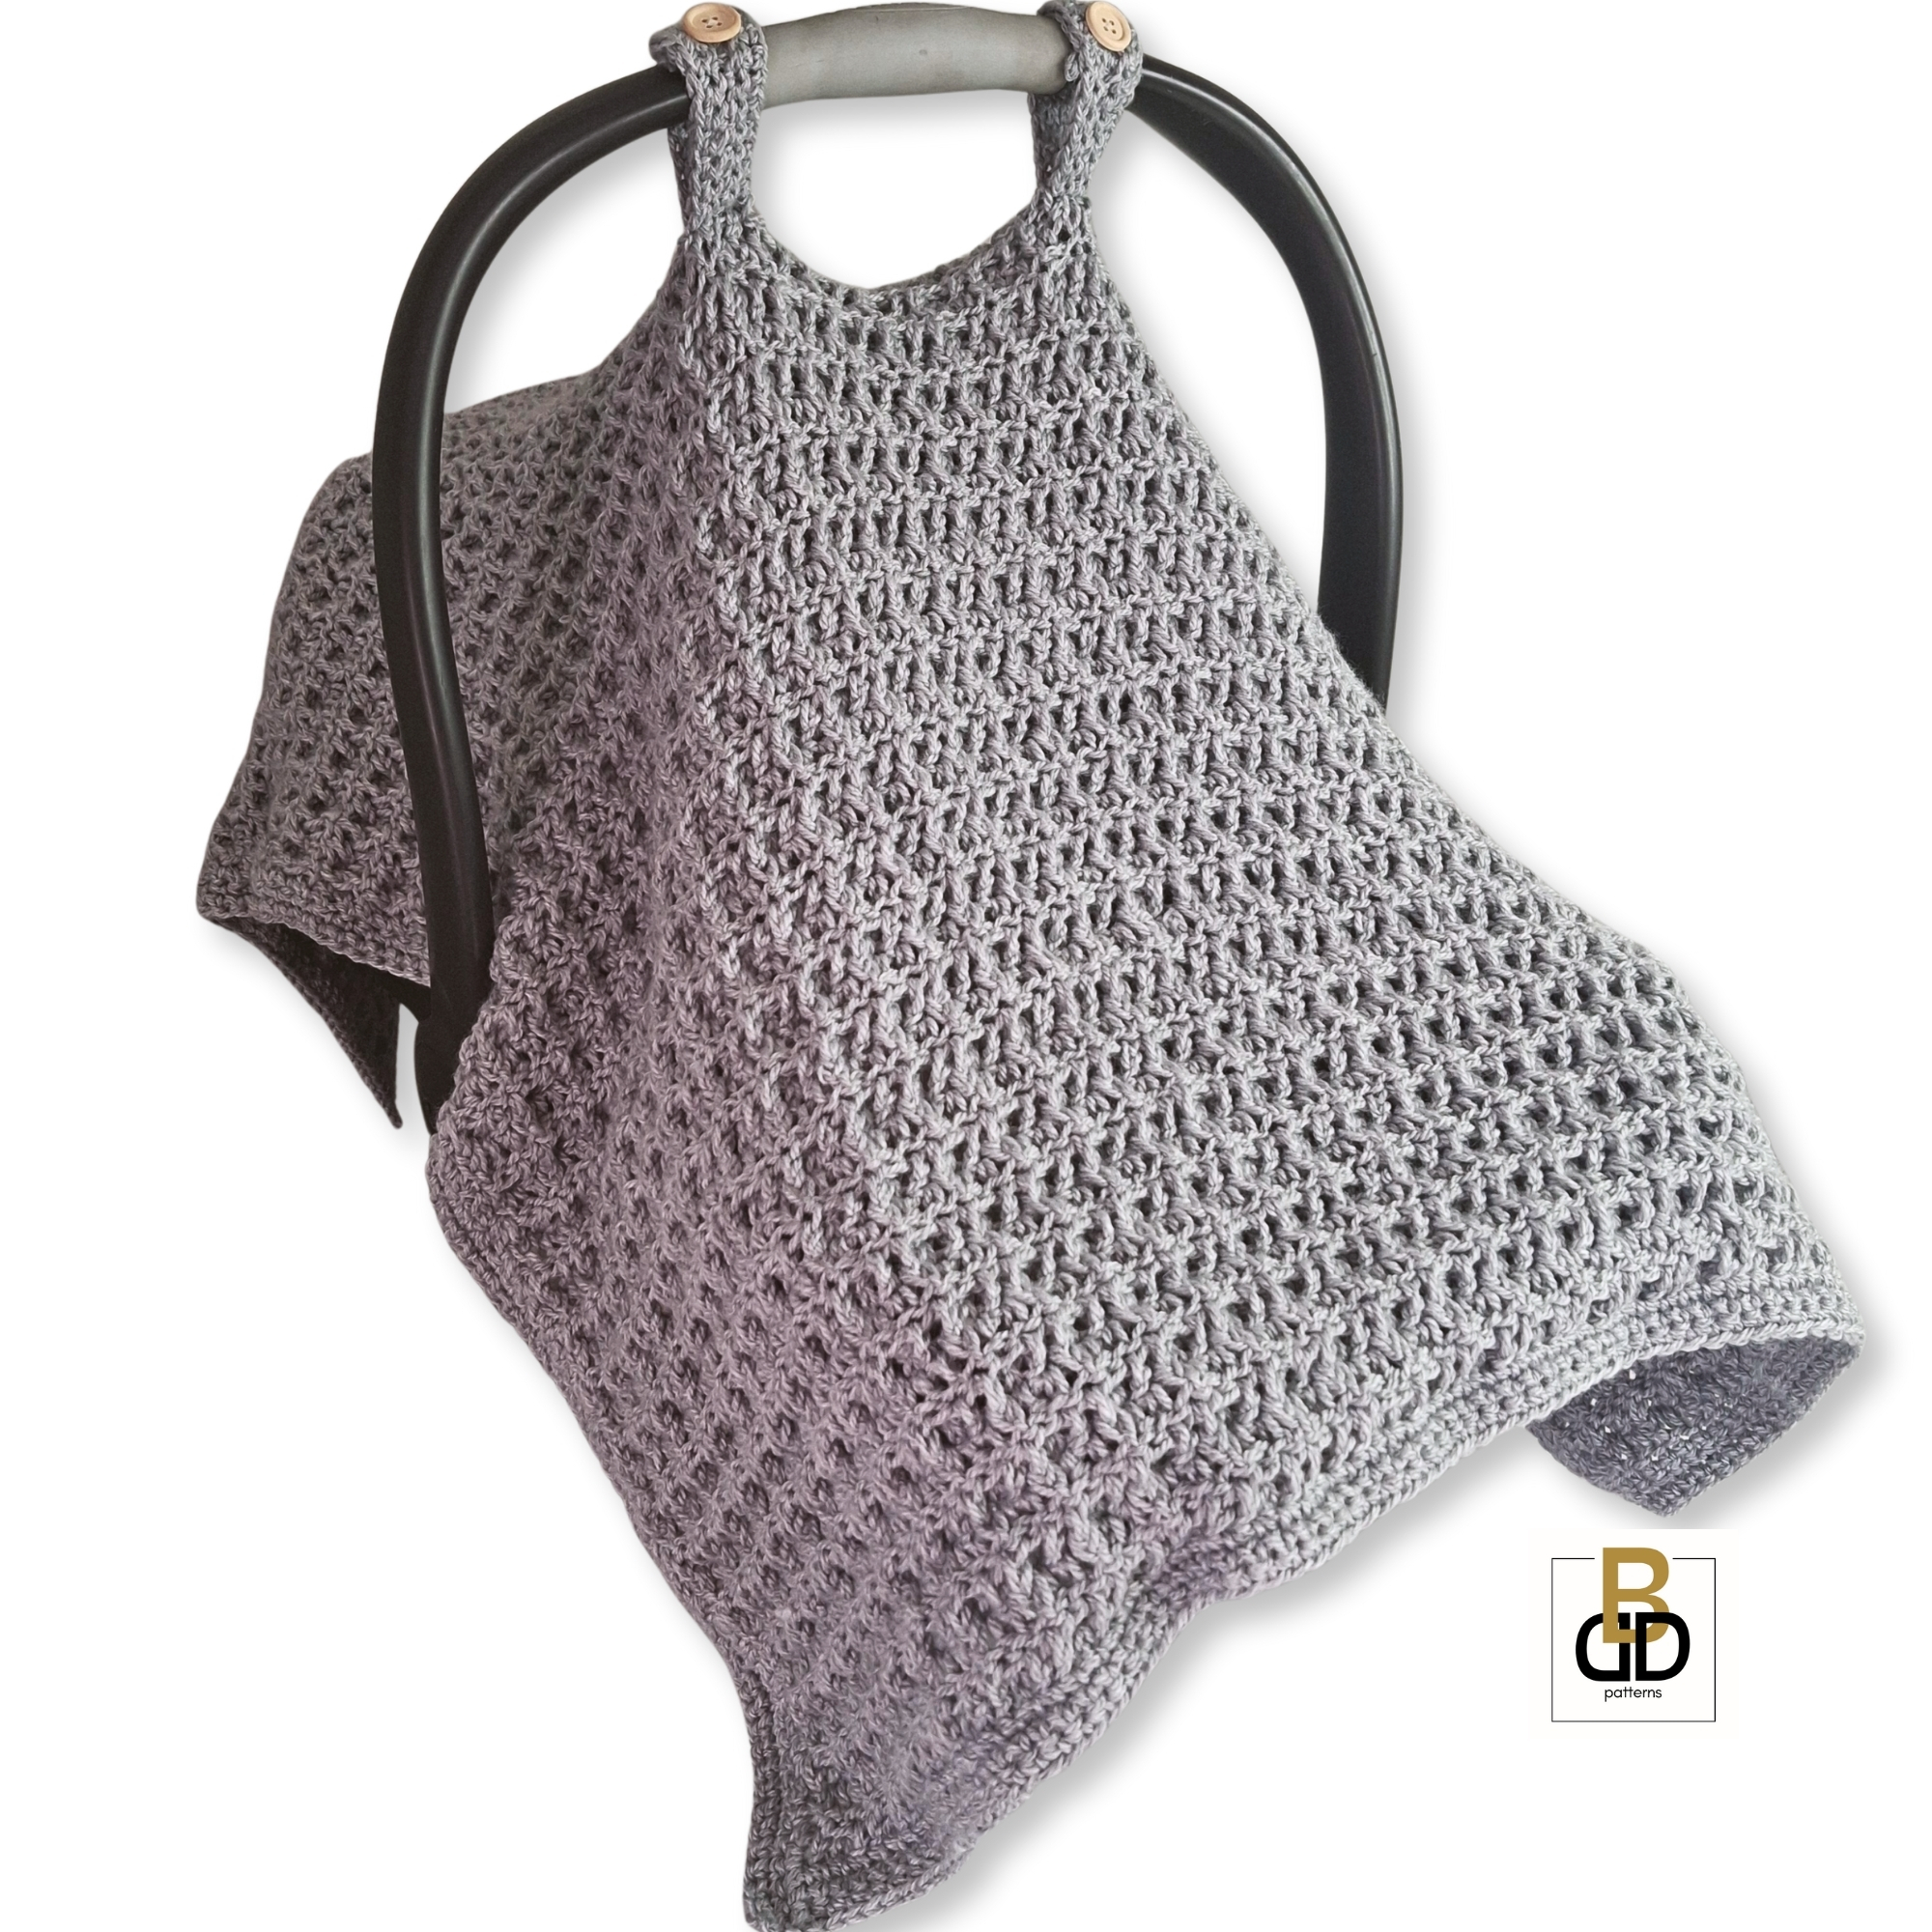
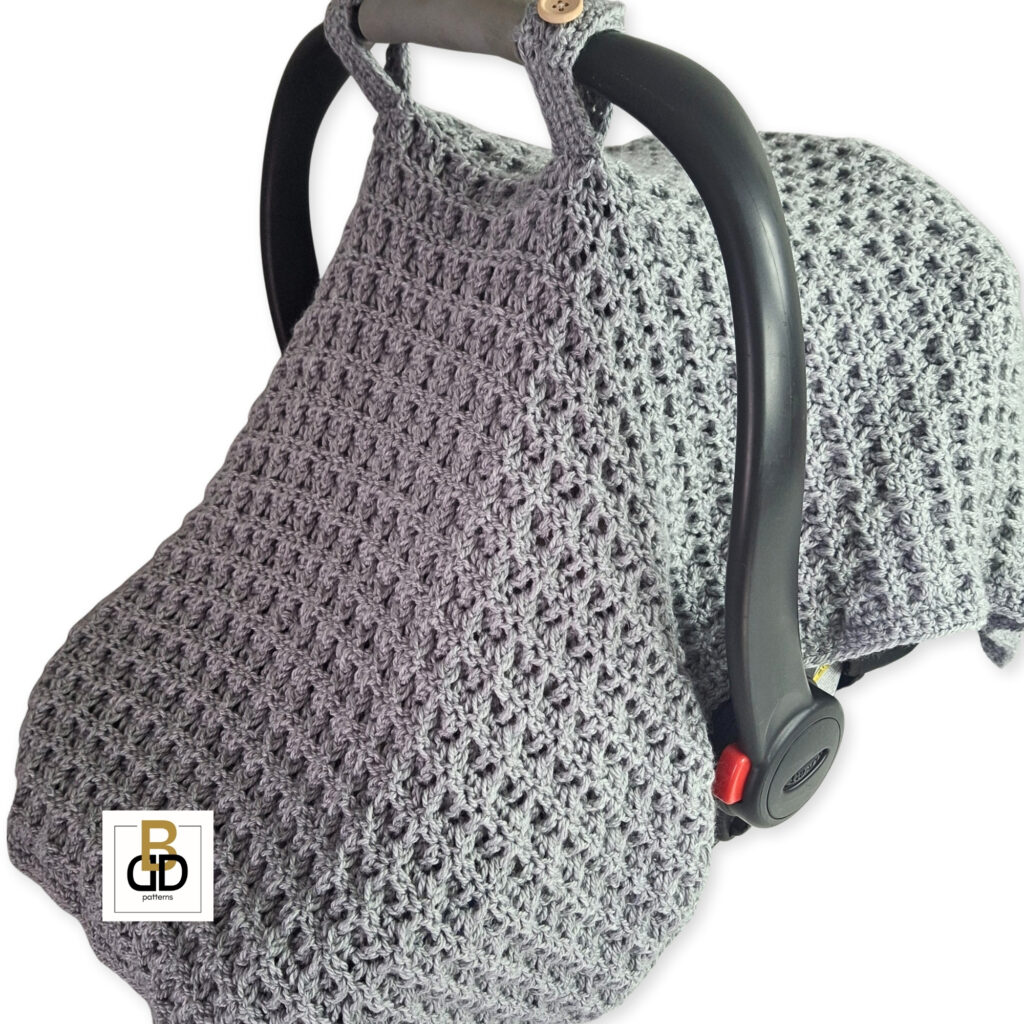
    If you’ve ever wanted a crochet project that looks impressive but doesn’t require you to wrestle with complicated stitch patterns, the one-row waffle stitch blanket is the answer. This design is delightfully easy—once you learn the repeat, your hands almost move on their own. Even better, this project is incredibly versatile. With a few simple adjustments, your cozy waffle stitch blanket can transform into the most practical and beautiful baby car seat cover. That means one thoughtful crochet project becomes two timeless gifts.

    Whether you’re crocheting for yourself, for family, or for an upcoming baby shower, this is the kind of project that will make you feel accomplished, proud, and excited to share your handmade work.


    Materials You’ll Need

    You don’t need much to get started, and everything is beginner-friendly. Here are the essentials:


    Our Favorite

    Baby Trend Passport® Switch 6-in-1 Modular Stroller Travel System with EZ-Lift™ Plus Infant Car Seat, Dash Black

    $49
    $229.99
    • Versatile Stroller and Car Seat Combo with 6 Modes of Use: The Baby Trend Passport Switch Modular Travel System is a versatile stroller and car seat combination featuring our EZ-Lift PLUS Infant Car Seat and Base
    • The 6 modes of use include: Infant Car Seat facing parent, Infant Car Seat forward facing, Bassinet facing parent, Bassinet forward facing, Toddler Seat facing the parent, Toddler Seat forward facing
    • Included Phone Holder: The Passport Switch Modular Travel System is designed with a phone holder at center of parent handlebar for convenience and security
    • Flex-Grip Cup holder for Your Drinks: Easy flex-grip cup holder on the side holds large water bottles or small drinks, providing ultra-convenience for your stroll
    • Extra Large Storage Basket with Front and Rear Access: The large storage basket allows parents to access strolling necessities and baby’s toys from both front and rear
    • Includes the lightweight, EZ-Lift PLUS Infant Car Seat
    • The infant car seat handlebar turns into an anti-rebound bar when placed in forward position for added safety
    • The EZ-Lift includes a built-in side grip for ergonomic carrying

    Getting Started: The Waffle Stitch Foundation

    The magic of the waffle stitch lies in its texture. The raised “pockets” are created with simple front post double crochets (FPdc) paired with regular double crochets. Don’t be intimidated by the terminology—once you try a front post double crochet, you’ll see how intuitive it feels.

    Itzy Ritzy Car Seat Spiral and Busy Ring Teething Toy Bundle (Rainbow)

    • ON-THE-GO ENTERTAINMENT: Make travels with your little one a joy with Itzy Ritzy’s Activity Toy. Perfect for infants aged 0 months and up, it ensures a delightful experience during car rides and strolls, keeping your baby happily engaged.
    • BABY SENSORY TOY: The Bitzy Busy Ring teething toy features a braided teething ring and an array of dangling toys. With textured ribbons, a crinkle sound, and a gentle jingle bell, it provides sensory stimulation to keep baby entertained.
    • SENSORY ADVENTURES: Engage your baby’s senses with the soft moon toy, with a dangling mirror that reflects light. The quilted rainbow toy adds visual delight with two hexagon clinking rings, encouraging reaching & grasping for motor skill development.
    • BABY MILESTONES: This baby hanging toy isn’t just fun; it’s designed to promote crucial developmental skills. Its textured teether and dangling star encourage reaching and grasping, fostering motor skills and hand-eye coordination in growing infants.
    • CALM & EXPLORATORY: Experience soothing travels as the cloud toy emits gentle jingle sounds, creating a calm atmosphere. The textured grosgrain ribbons provide sensory exploration, ensuring your baby’s hands stay occupied during on-the-go adventures.
    • ON-THE-GO FUN: From errands to family outings, this sensory teething toy keeps your baby entertained. Easily attach it to a car seat or stroller, ensuring that your little one stays engaged and entertained no matter where the day takes you.
    • SECURE & SIMPLE SETUP: Effortlessly attach the soft, flexible spiral to car seats or strollers, securing it with added loops. Prioritizing safety and convenience, Itzy Ritzy ensures a fuss-free, secure attachment for worry-free play.
    • GENTLE & SAFE: Made from soft natural cotton fabric, this baby teething toy is gentle on your baby’s delicate skin. It provides a safe and soothing teething experience for babies ages 0 month and up.
    • THOUGHTFUL GIFTING: Looking for a thoughtful gift? Consider Itzy Ritzy’s Spiral Car Seat & Stroller Activity Toy—a delightful present that adds a touch of joy to any journey. Practicality with a playful spirit, it’s perfect for on-the-go families.
    • PERFECT GIFT: Thoughtfully designed with every detail, the Bitzy Busy Ring offers endless teething, play, and exploration, making it an ideal gift for baby showers, birthdays, holidays, or simply to celebrate milestones in your little one’s life.
    1. Chain a multiple of 3 + 2 to start. (This ensures your rows will be even and your edges straight.)

    DoHonest Baby Car Camera 7-Inch: USB Plug and Play Easy Setup 360 Degree Rotating Backseat Camera Two Kids HD 1080P Rear Facing Car Seat Cameras Clear Night Vision -V9

    • Crystal Clear HD 1080P Video Quality: Enjoy HD 1080P video that clearly displays your baby’s conditi…
    • 360° Rotating Camera for Full Visibility: The 360° rotating camera allows full flexibility, providin…
    • Easy Installation in Under 3 Minutes: No tools needed—just strap the camera to your headrest, plug i…
    • 150° Wide Angle View for Full Coverage: With a 150° wide-angle lens, the camera captures a broad vie…
    • Advanced Infrared Night Vision: The built-in infrared night vision ensures your baby’s safety is mon…
    • 7-Inch HD Display for Easy Viewing: The 7-inch LCD monitor provides clear and large visuals, allowin…
    • Sturdy Suction Cup for Secure Mounting: The strong suction cup mount ensures your camera stays firml…
    • Peace of Mind for Parents, Full Visibility for Babies: Monitor your baby safely without taking your …
    • Versatile Placement Options for Flexible Setup: Whether on the dashboard, center console, or windshi…
    • Long-Lasting Durability with Lifetime Support: Built with premium materials for durability, this bab…
    1. Row 1: Work a double crochet across the entire row. This sets up your foundation.

    Delywh Wood Blanket Ladder, 57.5'' Rustic Towel Quilt Throw Blanket Ladders for The Living Room, Bedroom, Nursery Stand Holder, Wooden Decorative Ladder for Blankets Rack Farmhouse Home Decor, White

    • Space-Efficient Design: 57.5’’ tall, 18.9’’ wide white blanket ladder fits snugly in corners with 6 tiers for ample storage. Versatile for any room.
    • Durable and Easy Setup: High-quality wood ladder, designed for stability and easy assembly, enhances living and bedroom decor.
    • Aesthetic Rustic Appeal: Natural wood adds country elegance. Ideal for various rooms, blending functionality with decorative charm.
    • Functional Year-Round: Robust structure for daily use and seasonal displays. Transforms from practical storage to festive centerpiece.
    • Safety First: Not for climbing. Decorative ladder for light storage like blankets and books, ensuring child safety in living spaces.
    1. Row 2: Here’s where the texture begins. Alternate two double crochets, one front post double crochet. Continue across, then finish with a double crochet at the end.

    mommore Diaper Bag Tote, Large Capacity Travel Diaper bags, Hospital Bag for Labor Delivery, Baby Bag with Pacifier Case, Changing Pad

    • Spacious Diaper Tote: Offering…
    • Durable Baby Bag: Featuring a …
    • Practical Duffle Bag: The Baby…
    • Versatile Usage: Ideal for var…
    • Perfect Gift: A must-have esse…
    1. Row 3: Alternate one front post double crochet, two double crochets across the row, finishing with a double crochet at the end.

    Gerber Unisex Baby 4 Pack Sleep 'N Play Footie Sheep Grey 0-3 Months

    $49
    • 4-PACK SLEEPER ESSENTIALS – Includes four footed Sleep N’ Plays designed for bedtime, naps, lounging, and play. A practical baby apparel multipack parents can rely on. Durable construction holds up to frequent washing.
    • SOFT 100% COTTON COMFORT – Made with breathable cotton fabric that feels gentle on delicate skin and helps keep baby comfortable day or night. Lightweight material offers softness parents love. Helps regulate temperature for safe sleeping.
    • FULL-LENGTH ZIPPER FOR EASY CHANGES – Front zipper design makes dressing a breeze and diaper changes simpler, especially during nighttime changes. A safety tab at the top helps protect baby’s chin and neckline for added comfort.
    • WARM TOES AND SCRATCH-PROOF MITTENS – Footed pajamas help keep baby warm from shoulders to toes without needing separate socks. Newborn and 0-3 month sizes include mitten cuffs to help reduce accidental scratches.
    • CUTE PRINTS, EASY CARE, GREAT VALUE – Features adorable prints of animals, elephants, veggies, and southwest-inspired designs that are perfect for daily wear, gifting, and baby registry picks. Machine washable fabric holds up well through frequent washing.

    Row 4 (repeat row): fpdc into the first dc st post, dc into the next 2 sts, fpdc into the next st, repeat from * across. The last st will always be a dc into the top st of the previous row turning ch. Repeat until desired height.

    👉 Tip: Always count your stitches at the end of every row. With waffle stitch, it’s easy to get lost in the rhythm and forget a double crochet at the edge. Consistent stitch counts keep your edges neat.


    Why Crocheters Love This Stitch

    Easy to memorize: After the first 3 rows, Row 4 is the rest of the pattern

    • Incredible texture: It looks complicated, but it’s only one row of repeat.
    • Flexible sizing: Want a throw, a stroller blanket, or a baby cover? Just chain more or fewer stitches at the start. The written pattern includes a chart to make this in sizes all the way up to a king size blanket.
    • Perfect for gifting: The waffle stitch looks designer-made, even if you’re a beginner.

    Construction: Turning the Blanket into a Car Seat Cover

    Here’s where the versatility shines. When your waffle stitch blanket is finished, you can transform it into a baby car seat cover with just a few small steps:

    1. Measure your finished blanket. Baby car seat covers typically measure about 30″ x 36″.
    2. Crochet two small tabs.
      • Chain 8, single crochet back and forth until the strip measures about 4″.
      • Make two identical tabs.
    3. Sew the tabs onto the center top edge of your blanket, about 8″ apart.
    4. Add a button to each tab.
      • The buttons loop through the car seat handle and keep the cover in place.

    That’s it! No extra panels or complicated shaping. Your beautiful waffle stitch blanket is now a practical, cozy cover to protect baby from sun, wind, or unwanted touches while in the car seat.

    👉 Pro tip: Use washable yarn and sturdy buttons. Moms will appreciate the durability, and you’ll know your gift will stand the test of time.


    A Baby Shower Story

    I’ll never forget the first time I gifted one of these waffle stitch blankets turned car seat covers. A close friends daughter was expecting her first baby, and like many new moms, she already had plenty of clothes, bottles, and toys. What she didn’t have was something handmade.

    When she unwrapped the blanket, the room actually fell quiet for a moment—everyone leaned in to touch the texture. The “wows” came quickly. But when I showed her how it buttoned neatly over the car seat handle, her face lit up. She laughed and said, “This is genius—I would have never thought of this!”

    2 months later, she sent me a photo of her little one snoozing peacefully under the cover during a grocery run. She told me it became her “can’t leave the house without it” item. And that’s when I realized: this simple project isn’t just a blanket or a car seat cover—it’s comfort, convenience, and love stitched together. She asked me to crochet another in a heavier yarn as a blanket. If you sell finished crochet pieces, this will surely become a best seller.


    Tips for Success

    • Count every row. Uneven stitch counts will make your edges slope.
    • Block lightly. A gentle steam block helps the waffle texture pop beautifully.
    • Choose yarn wisely. Soft cotton blends or baby-weight acrylics are best—they’re breathable, washable, and baby-safe.
    • Experiment with color. Try stripes, ombrés, or solid neutrals for a timeless look.
    • Add finishing touches. A simple single crochet border makes the edges crisp and polished.

    TeoKJ Over the Door Hanging Basket, 3-Tier Woven Cotton Wall-Mounted Storage Organizer Bag Decorative Hanging Nursery Baskets, Jute

    $49
    • Premium Material: These nurser…
    • Widely Usage: These over-the-d…
    • Washable & Folding : Rope hang…
    • Best gift choice: Cotton woven…
    • Large Capacity: The whole wove…

    Why This Pattern Belongs in Your Project Queue

    Crochet projects often fall into two categories: “quick and practical” or “time-consuming but stunning.” This waffle stitch blanket is both. It works up easily but looks like something you’d find in a boutique. The fact that it doubles as a car seat cover makes it even more valuable.

    • Beginners love it because the stitches are simple and repetitive.
    • Experienced crocheters love it because it creates texture and beauty without constant counting.
    • Moms and gift-receivers love it because it’s useful every single day.

    And let’s be honest—there’s nothing like the feeling of giving a gift that gets real use. This project is more than just yarn and a hook—it’s a way to bless someone with comfort, style, and practicality.


    Final Encouragement

    If you’ve been waiting for a project that balances beauty with ease, the one-row waffle stitch blanket is it. You’ll be amazed at how quickly it comes together, and even more amazed when you see how it transforms into a car seat cover with just two little tabs and buttons.

    So grab your yarn, pick your hook, and get started today. Whether you’re making it for yourself, for a new mom, or for the joy of crocheting something that looks far more complicated than it really is, this project will become one of your favorites.

    👉 [Insert your internal link to the pattern here]

    Posted on

    The Checkpoint Throw: A Modern Black and White Crochet Blanket for Glamping & Home

    The Checkpoint Throw Easy Houndstooth Crochet pattern

    Looking for a crochet blanket that’s bold, modern, and campfire-approved? Meet the Checkpoint Throw, a black-and-white crochet blanket that brings graphic style and cozy comfort wherever you go — from your backyard to your glamping site. With an easy stitch repeat, simple colorwork, and breathable cotton yarn, this throw is the perfect weekend make for confident beginners and seasoned crocheters alike.

    Whether you’re wrapping up by a tent, gifting a modern home accent, or relaxing under the stars, the Checkpoint Throw delivers style and substance in one handmade project.


    The Checkpoint Throw Easy Houndstooth Crochet pattern

    Why You’ll Love the Checkpoint Throw

    🖤 Bold, Minimalist Style
    With its alternating black and white rows, the Checkpoint Throw creates a striking checkerboard or houndstooth-like effect that fits seamlessly into both modern interiors and rustic glamping setups.

    🧶 Beginner-Friendly Stitches
    Using a simple single crochet (sc), double crochet (dc) repeat across an even stitch count, this throw is meditative, easy to memorize, and ideal for zoning out by the campfire.

    👜 Portable and Practical
    Because it’s made in breathable cotton yarn, this throw is perfect for warmer seasons and packs well in a camper, RV, or picnic bag.

    ✂️ Minimal Weaving with the Carry-Along Technique
    One of the best parts? You’ll use the carry-a-strand method, so you won’t have to cut yarn at every color change. This technique keeps the back neat and dramatically reduces ends to weave in.


    Pattern Overview

    • Skill Level: Beginner
    • Yarn: Worsted weight cotton (#4), in black and white
    • Stitch Pattern: Repeating sc, dc combo across even-numbered rows
    • Finished Size: Approx. 30″ x 40″ (adjustable)
    • Construction: Flat, in rows
    • Optional Borders: See ideas below

    Suggested Borders for a Clean Finish

    Want to give your Checkpoint Throw a polished edge? Try one of these simple border options:

    1. Single Crochet Border: Work 1 round of sc around the throw, placing 3 sc in each corner. Clean and classic.
    2. Reverse Single Crochet (Crab Stitch): Add texture with this rope-like edge in black or white.
    3. Moss Stitch Border: Alternate sc and ch-1 for a modern, textured frame.
    4. Two-Tone Stripe Border: Do 2 rows of sc in black, then 2 in white, all the way around for a frame-like finish.

    Choose a border that complements your home or camping setup — minimal or bold, it’s up to you.


    Tips for Success

    🧵 Use Two Skeins at Once
    Double up your yarn (one black, one white) for a plush, thick fabric that works up quickly and holds its shape.

    🧺 Crochet Loose
    Cotton has less stretch than acrylic — work with a slightly looser tension to keep the drape soft.

    🌞 Block It Lightly
    After finishing, wet block your throw and gently stretch the edges to help those clean lines stand out.

    🧼 Machine Washable = Glamping-Approved
    Use 100% cotton so it’s easy to throw in the wash after outdoor use — no fuss, no stress.


    The Checkpoint Houndstooth Crochet Pattern

    Glamping Meets Crochet: Why It Works

    The Checkpoint Throw is part of my Let’s Go Glamping crochet collection — a 5-piece series of simple, practical, and beautiful cotton-based patterns perfect for camp life (but stylish enough for home). With breathable fibers, easy stitch repeats, and minimal finishing, these patterns are made for makers who love adventure and aesthetics.


    Grab Everything You Need To Crochet The Checkpoint Throw


    Pattern Release Details

    The Checkpoint Throw pattern will be released Monday June 23, 2025 as part of the Let’s Go Glamping series right here on BDD Patterns. Be sure to check back each week as we release 5 total designs perfect for summer crochet and glamping style.

    💌 Want the written pattern for FREE? Join my private Facebook Group


    Final Thoughts

    Crochet doesn’t have to be all pastels and granny squares — with the Checkpoint Throw, you can bring handmade warmth into modern, minimalist spaces or rustic outdoor retreats. With its graphic black-and-white palette, simple stitches, and washable cotton yarn, this project is one you’ll return to again and again.

    So grab your yarn, clear off your camp chair, and get ready to glamp in style — the Checkpoint Throw is your cozy companion on every trail.

    Posted on

    The Healthy Way to Crochet Standing Up: A Complete Guide to Ergonomics, Products & Personal Experience

    How To Crochet Standing Up

    Crocheting while standing isn’t just a novelty—it’s a revolutionary approach to fiber arts that can transform your crafting experience and physical wellbeing. After years of struggling with back pain from marathon crochet sessions, I discovered standing crochet and never looked back. Here’s what you’ll find in this eye-opening article.

    My personal standing crochet journey (with before/after insights)

    Science-backed health benefits of standing vs. sitting

    Complete ergonomic setup guide with 10+ product recommendations

    Step-by-step posture adjustments for pain-free crafting

    Real talk on adapting ANY project to standing work

    My Standing Crochet Transformation: A Personal Testimononial

    After 50 plus years of crocheting hunched on my couch or catching severe neck strain in a recliner, I started to notice that my legs were cramping and that it was gettin harder to stand up. I’ve been crocheting since I was 8 so this should give you a sense of how long I have been doing this

    I had a stand up desk for my office for a couple of years and it wasn’t until recently that I decided to see if I could become a stand up maker. I knew in my heart that if I didn’t find a way to make it work, my health would really suffer going forward. So, I decided to completely change the way I crochet.

    The Science of Standing: Why This Isn’t Just a Trend

    Recent studies reveal startling facts about prolonged sitting:

    🔬 University of Sydney Research (2022):

    • Sitting >4 hours/day increases back pain risk by 34%
    • Standing work reduces spinal disc pressure by 35%

    🧠 Mayo Clinic Findings:

    • Standing burns 50+ more calories/hour than sitting
    • Improves circulation, reducing hand stiffness in crafters

    💡 Key Takeaway: Standing crochet isn’t about sacrificing comfort—it’s about strategic movement that enhances your craft long-term.

    The Ultimate Standing Crochet Setup (10+ Product Solutions)

    1. Height-Adjustable Surfaces (Essential for All Projects)

    Why it matters: Your surface must move with you to prevent hunching over large projects. Here’s my personal

    Janet’s Picks:

    KOUPA Height Adjustable Mobile Standing Desk 16×24 in,360° Flip Desk Stand Desks Home Office Table Standing for Small Space Offices,Easy to Assemble(Adjustable Height: 32in-47in)

    $64.99
    • Height Adjustable Standing Computer Desk:This laptop desk is height adjustable from 32-47 inches, ergonomic, and supports sitting and standing switches to promote healthy and efficient work
    • Rotatable Tabletop:Desktop 270 ° bidirectional adjustment, with non-slip small stopper, smooth rounded corners design anti-scratch, 16 * 24 inches size, to create a comfortable office environment
    • Portable Standing Desk:Standing computer desk with storage bag optimizes desktop space.4 wheels silent and smooth, 4 locks stable and portable, 360° swivel wheels to adapt to the carpet
    • Premium Material:Laptop table legs with thickened steel frame, durable and anti-scratch, solid and safe. The desktop is reversible, suitable for all sizes of computers and tablets
    • Wide Used:The portable design of this laptop table can help you move it easily around rooms as an office workstation in the study, over the bed, or beside the sofa
    • Multi-scenario usage:You could also use it as a portable presentation lectern, drafting desk, coffee table, or travel table in a living room, bedroom, office, hospital, or public place

    ErGear Height Adjustable Electric Standing Desk, 48 x 24 Inches Sit Stand up Desk, Memory Computer Home Office Desk, Black

    $139.99
    • Electric Height Adjustable Standing Desk for Comfortable Work – Switch effortlessly between sitting and standing with this electric standing desk. The smooth height adjustment from 28.35″ to 46.46″ helps promote a more comfortable working posture and keeps your energy flowing throughout the workday. Ideal for home offices, gaming setups, and productivity workspaces.
    • Powerful Motor with Memory Presets – Equipped with a quiet, powerful lift motor, this sit stand desk allows seamless adjustments at the touch of a button. Save up to 4 preferred height settings so you can instantly return to your perfect working position every time.
    • Exceptional Stability Steel Frame – Built with a heavy-duty alloy steel frame and aerospace-grade lifting columns, this adjustable desk remains stable even at maximum height. Tested for 100,000 lift cycles, it delivers long-lasting durability for daily work, studying, or gaming.
    • Easy Assembly & Low-VOC Materials – Designed with low-VOC materials to help reduce indoor emissions and create a healthier workspace. With simplified assembly and included tools, you can set up your new adjustable standing desk workstation quickly and start working comfortably.

    WKWKER 100% Bamboo Laptop Desk Flat Surface Lap Stand Table with Folding Legs Portable Table Bed Tray for Workstation Computer Writing Studio (Natural)

    • Laptop desk, No need to install. Measurement 16.1’’L x 12.6’’W x 6.9’’H, foldable legs for easy storage and carry, perfect top size for breakfast laptop magazine etc.
    • Classic foldable bed desk: the entire smooth top surface and foldable legs, simple but meet your basic daily requirements.
    • Strong Safe Structure: Reinforced table edges on both sides make the table legs sturdier, all made of natural bamboo, safe and odorless.
    • Multi-use Table Desk Bed Tray: the little desk can be used to work or study as a lap desk, small table desk for bed TV dinner sofa snack. Serving food as breakfast tray table for daily use.
    • Breakfast Table desk care: Surfaces are smooth and easy to wipe clean a wet cloth or a dry cloth. Please do not soak.

    2. Anti-Fatigue Systems

    The Standing Desk Mat - Topo by Ergodriven | Premium Not-Flat Anti-Fatigue Standing Desk Mat with Calculated Terrain | Ultra-Thick Deluxe Comfort Foam, Durable, PVC-Free | Accessories | Obsidian Black

    • CRITICAL STANDING DESK ACCESSORY – If you have a standing desk, you need a standing desk mat. Why? Because with no mat (or a cheap one), you’ll feel more pain and fatigue, which results in standing less and sitting more. A good mat solves this problem!
    • THE BEST STANDING DESK MAT – Topo is the first ever mat designed specifically for standing desks. This isn’t just a cheap flat kitchen mat. It is made to give you the best possible standing desk experience.
    • FEEL BETTER AT WORK AND AFTER – With Topo, you’ll move more while you stand, without even thinking about it. This will help you feel better, so you’ll stand more and sit less. When you leave work at the end of the day, you’ll feel healthier and more energetic.
    • FOR STANDING DESK USERS BY STANDING DESK USERS – We created Topo to solve the aches and pains that standers like us feel using flat kitchen mats for long hours at our standing desks. Now over 500,000 happy standers agree – Topo is magical!
    • TOPO WORKS FOR YOU – Just put your Topo mat on the floor in front of your desk and step on. You’ll instantly feel the premium anti-fatigue material – it’s cushioned yet supportive. Within minutes, you’ll be moving more as your feet subconsciously explore Topo’s 3D Calculated Terrain.
    • MAKE THE MOVE TO STANDING EASIER – You can reposition Topo with just one foot, unlike flat anti-fatigue mats designed for kitchens. Grab Topo’s unique indentation with your heel or toe to pull the mat out from under your desk. Then just push forward to slide it back.
    • “IT’S WORTH IT” – Over half a million units sold and the reviews don’t lie. Topo has been The NYT Wirecutter’s top pick since 2016 for a reason – because investing in Topo unlocks the full value of your standing desk.
    • AMERICAN INNOVATION – Topo is the original not-flat mat. It is designed, sold, and supported by an American company (unlike competitors). If you need customer service, you’ll appreciate our fast and friendly support.
    • GET THE TRUE BENEFIT OF STANDING: Topo will leave you feeling energized and productive, because the more you move, the better you feel. You can buy with confidence thanks to Topo’s 7-year manufacturer’s warranty and 100% full-refund satisfaction guarantee.

    ErgoFoam XL Foot Rest for Under Desk at Work for Stools & High Chairs Chiropractor-Endorsed 2in1 Adjustable Under Desk Footrest Ergonomic High-Density Compression-Resistant Foam Nonslip Foot Rest

    • LARGER than other foot rests – AT 7.5″ TALL, the ErgoFoam XL is the only foot rest specially designed for STOOLS and HIGH CHAIRS.
    • FOR THE BEST SUPPORT POSSIBLE, your under desk foot rest should be CUSTOMIZABLE to your needs – but many foot stools are THE WRONG HEIGHT and AREN’T ADJUSTABLE. Made by the only foot rest brand endorsed by U.S. chiropractors, the ErgoFoam Adjustable Foot Rest ADJUSTS EASILY to the optimum height for your chair & leg length, providing the support you need for LONG-LASTING COMFORT, BETTER POSTURE, and RELIEF FROM LUMBAR, BACK, and LEG PAIN.
    • THE AVERAGE OFFICE FOOT REST is great for the first fifteen minutes, but then starts to FLATTEN OUT due to LOW-QUALITY FOAM that’s too soft and flimsy. Our high-density ErgoFoam was developed to MAINTAIN ITS SHAPE and FIRMNESS over time, RESISTING COMPRESSION under the weight of your legs and feet – and providing better support than memory foam foot rest s. With a DOUBLE-SIDED NONSLIP BOTTOM, this under desk foot stool stays put and won’t slide around on your floor.
    • 2 FOOT RESTS IN 1! Larger and wider than other foot rest stools, our ergonomic foot rest under desk design features an ARCHED STRUCTURE for COMFY SUPPORT throughout the day. WANT TO GET YOUR FEET & LEGS MOVING? Flip over your foot pillow to transform it into a ROCKER FOOT REST for increased circulation and muscle movement. With our foot stool under desk cushion, you’ll notice IMPROVED POSTURE and less back, hip & leg pain. To clean, simply remove its velvet cover and TOSS IT IN THE WASH.
    • OUR PROMISE TO YOU: We developed our adjustable foot rest for under desk to be THE ABSOLUTE BEST FOOT CUSHION on the market, providing UNPARALLELED FOOT SUPPORT, better posture & circulation, and REDUCED PAIN and PRESSURE on the legs, back, and spine. If for any reason you aren’t satisfied with your office foot rest under desk pillow, WE’RE STANDING BY TO HELP make it right – no questions asked. WE MAKE OUR CUSTOMERS OUR VERY TOP PRIORITY.

    3. Project Support Tools

    CigeZaus Oval Wooden Yarn Bowls for Crocheting, Large Handmade Storage Crochet Bowl for Crocheting and Knitting Lovers

    • Dimensions: 11.2″ x 5.9″ x 4.9″
    • Capacity: Holds 7 oz of yarn or multiple small yarn balls
    • Weight: Approximately 710 grams (about 1.6 lbs)
    • Stability: Designed not to tip over easily
    • Dual Swirl Grooves: The yarn bowl has a swirl groove on each side. This feature allows you to keep multiple strands of yarn untangled and smoothly flowing while you knit or crochet.
    • Plenty of Storage Space: If you have a lot of knitting supplies, this yarn bowl offers ample space to store your crochet hooks and other accessories.
    • High Edge Oval Design: The edges of this yarn bowl are higher than most on the market, which helps prevent your yarn balls from falling out. The surface is smooth and comfortable to the touch, with no noticeable roughness.
    • Perfect Gift for Knitting Enthusiasts:This yarn bowl makes a great gift for beginners, knitting and crochet lovers, or anyone who appreciates quality crafting tools.

    Clover Wonder Clips Pkg of 50, Red

    • These mini clips feature great holding capacity and have a multitude of uses
    • Each clip opens wide to hold layers of fabric and the clip base is flat for easy feeding to the presser foot
    • Perfect for making quilts, handbags and more
    • Package contains 50 wonder clips

    Posture Masterclass: A Physical Therapist’s Guide

    Certified PT Dr. Lisa Hammond breaks down the 4 Pillars of Standing Crochet Posture:

    1. The 90-Degree Rule
      • Elbows bent at right angles
      • Wrist neutral (not cocked)
    2. Dynamic Standing
      • Shift weight every 5 minutes
      • Try “calf raises” between rows
    3. Eye-Level Work Zone
      • Position projects at collarbone height
      • Use a necklace magnifier if needed
    4. Microbreak System
      • Set a 20-minute timer for stretches
      • Sample routine included below

    (Detailed illustrations available upon request)

    Debunking Myths: Yes, You CAN Stand for Large Projects!

    Myth: “Standing only works for small items”

    Reality: With these adaptations, any project thrives:

    • Blankets: Use a project sling to support weight
    • Garments: Try a dress form to hold sections
    • Amigurumi: Rotating turntable prevents neck strain

    Case Study: Margaret R., who crocheted a queen-sized wedding blanket standing:

    “The UPLIFT desk let me adjust heights for different sections. My back pain disappeared after switching from 8-hour sitting marathons to standing sessions with breaks.”

    Your 30-Day Standing Crochet Challenge

    Week 1: Start with 20-minute standing sessions

    Week 2: Implement one new ergonomic tool

    Week 3: Convert a large WIP to standing

    Week 4: Full transition with customized routine

    Bonus: Download our printable posture checklist

    Final Thoughts: Why I’ll Never Go Back

    Standing crochet gave me back the joy of crafting without pain. Whether you’re making delicate doilies or massive afghans, the right setup makes every stitch healthier.

    Your Turn: I’d love to hear your standing crochet stories! Share them below or tag #StandingCrochetRevolution on social media.